Vehicle Detection Project
Vehicle detection is a quite highly researched area with open datasets like KITTI and others from Udacity all over the web. Realtime models like Yolo to better accuracy models like R-CNN to more complicated models have made this topic more and more accessible with pre-trained models. This project was the 5th and last project from the Term 1 of Udacity’s Self Driving Cars.
This project was focused towards using Support Vector Machines, Decision Trees along with a host of Computer Vision Principles. However, after trying out and experimenting with all those techniques I decided to use a Deep Learning approach to this problem because of quality reasons.
I could not get a model reliable enough along with the heatmap approach to filter out false positives. Thus the deviation to using a Convolutional Neural Network for this project.
The goal of this project is to recognize vehicles from a live video capture.
High Level Approach
The high level algorithm of this project was as follows.
- Explore the dataset provided by Udacity.
- Train a CNN on this dataset.
- Process Each frame of the video clip
- Use a sliding window approach to search for vehicles in the video frame
- Predict the presence of a vehicle in each sliding window
- Filter out false positives with a Heatmap approach.
Training dataset
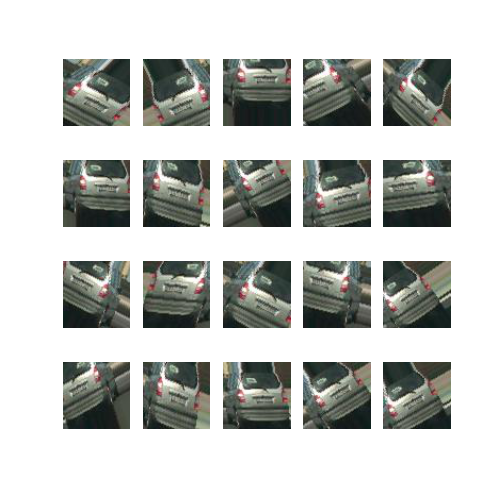
The training dataset by Udacity was a balanced dataset with most of it coming from the GTI / KITTI Dataset. The images we classified into either vehicles and non-vehicles. One important feature of this dataset was for for vehicles it provided examples of different cars, different orientations (left, right, back) etc.
[[ Images for the car from different orientations ]]
For the non-vehicles also different categories of images were present. This included trees, roads, sky, edge of roads etc.
All in all, however it was a balanced dataset.
- Vehicles: 8792
- Non Vehicles: 8968
Abandoning the HOG / SVM approach
I tried the HOG + color histogram + spatial features approach with both SVM & Decision Tree. The SVM & Decision Tree, when trained on the training data was giving ac accuracy of about 97 to 98% however, running on the actual video clip was giving a lot more false positives. Neither playing with different HOG parameters nor the heatmap approach helped with the false positive elimination and thus I abandoned that approach.
Convolutional Neural Network
Since we have dealt with CNN’s in our past project, this was yet another good opportunity to try out deep learning for this project. I used Keras and wrote a simple model, very similar to Lenet but having 2 more extra convolutional layers.
The network was mostly inspired by this blog post on the Keras Blog
Architecture

Model Description
The model is a simple 4 layer ConvNet with dropouts added in between since dropout also helps reduce overfitting, by preventing a layer from seeing twice the exact same pattern, thus acting in a way analoguous to data augmentation Keras Blog
The first 4 conv layers increase in the number of inputs they take to slowly learn the parameters. The use of 4 layers was to make sure that the network learns enough characteristics to distinguish vehicle and non-vehicle images with minimal false positives.
Data Augmentation
Since the dataset isn’t very big, overfitting is a concern and hence I decided to perform training data augmentation using the Keras generator. Keras generator lets us augment the training data at runtime with a very simple to use api. The following lines of code show how the Image Generator is used to augment the training data.
generator = ImageDataGenerator(featurewise_center=True,
                               samplewise_center=False,
                               featurewise_std_normalization=False,
                               samplewise_std_normalization=False,
                               zca_whitening=False,
                               rotation_range=20.,
                               width_shift_range=0.4,
                               height_shift_range=0.4,
                               shear_range=0.2,
                               zoom_range=0.2,
                               channel_shift_range=0.1,
                               fill_mode='nearest',
                               horizontal_flip=True,
                               vertical_flip=False,
                               rescale=1.2,
                               preprocessing_function=None)
Network Performance
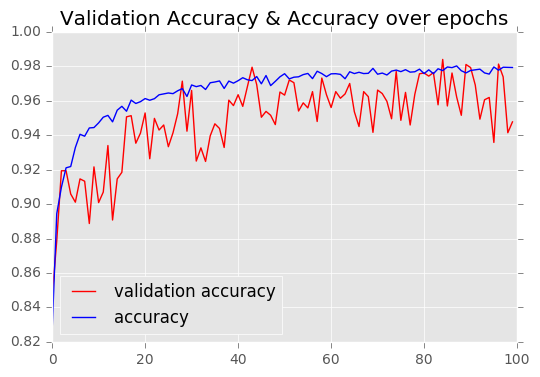
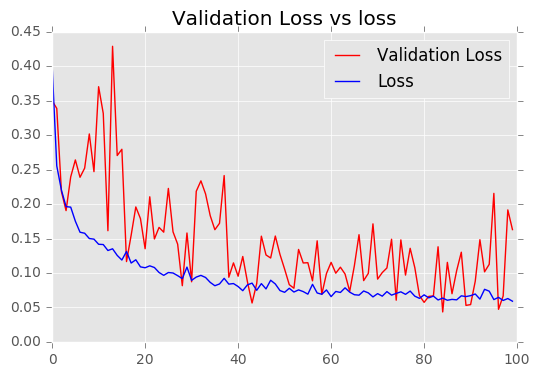 As can be seen over 100 epochs, the network does overfit quite a bit. This would need more tuning and possible addition of L2 normalization factors
Inception Model
I was curious to try out a smaller inception model since inception models let you try different convolutional layers without making them very deep. The advantage is that the layers don’t have to be as deep and yet learn various features from the images due to the use of different Convolution sizes.
Architecture
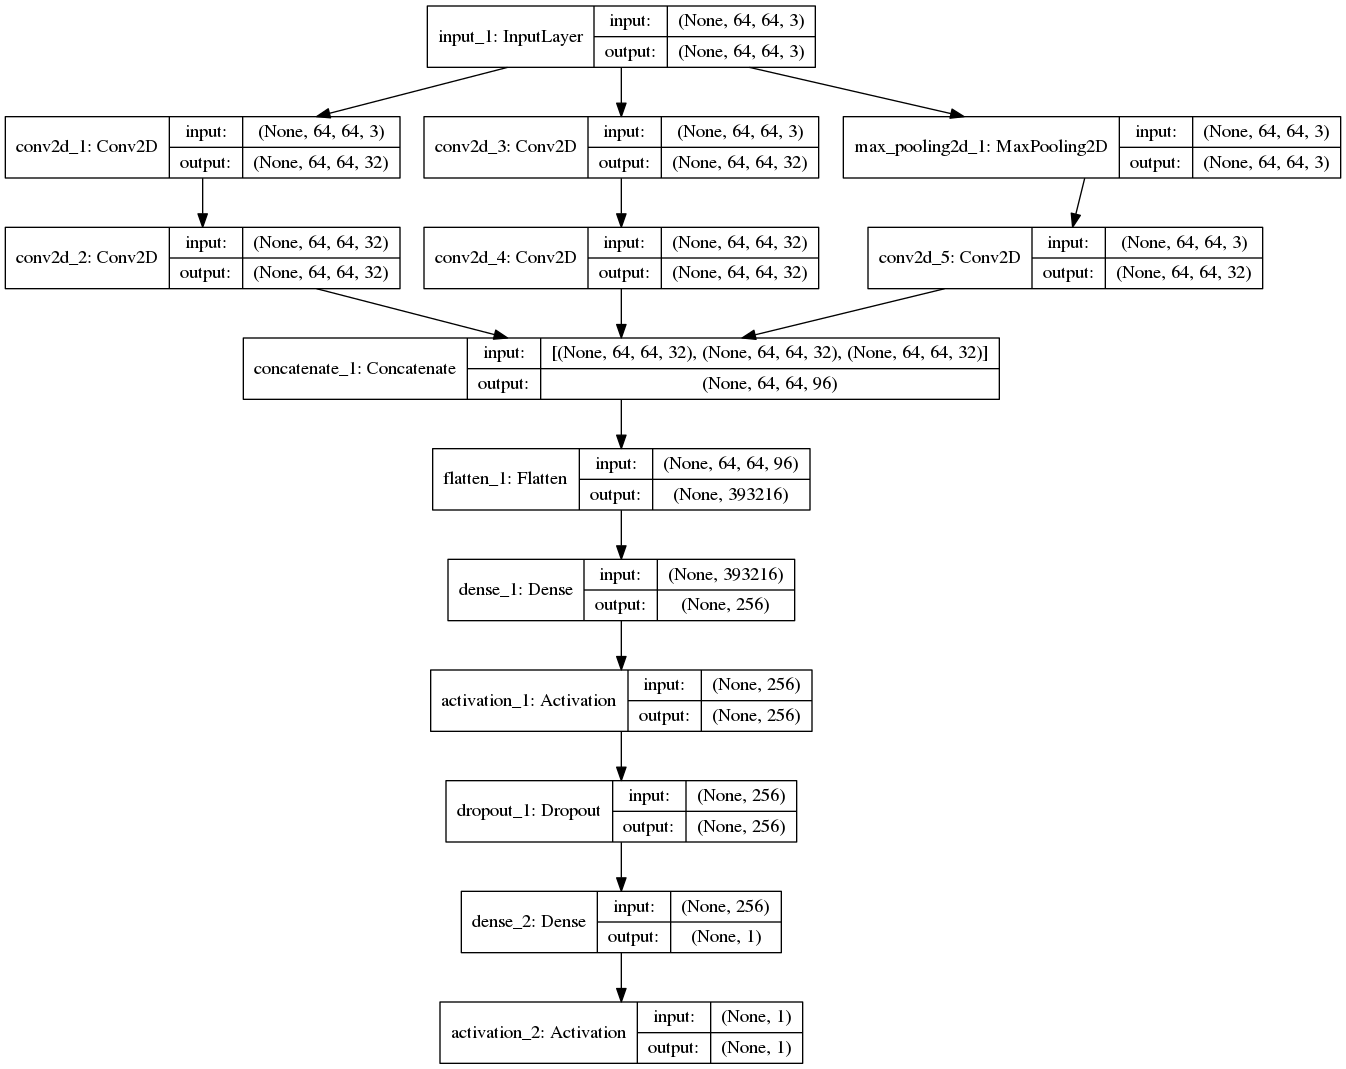
The chosen architecture was very simple. It consists of 3 parallel layers, 2 Conv and 1 Maxpool layers.
1st parallel layer consists of 2 Conv Layers of (1, 1) & (3, 3)
2nd parallel layer consists of 2 Conv Layers of (1, 1) & (5, 5)
3rd parallel layer is the maxpool layer.
Network Performance
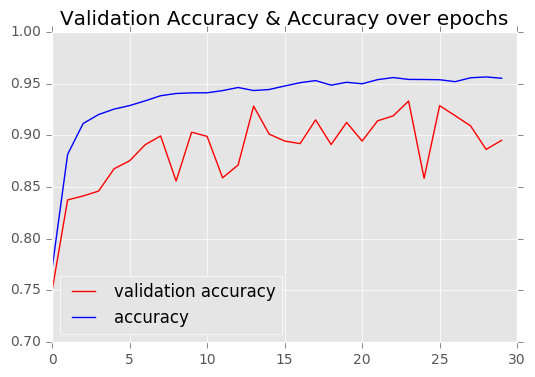
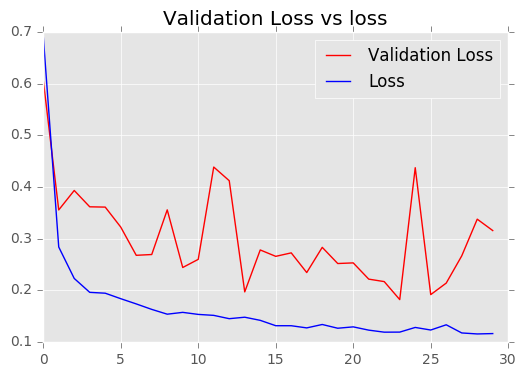
This network was comparatively slower than the Custom network and hence I ran it for 30 epochs. Performance wise it reached about 93% accuracy but started overfitting after about 85%.
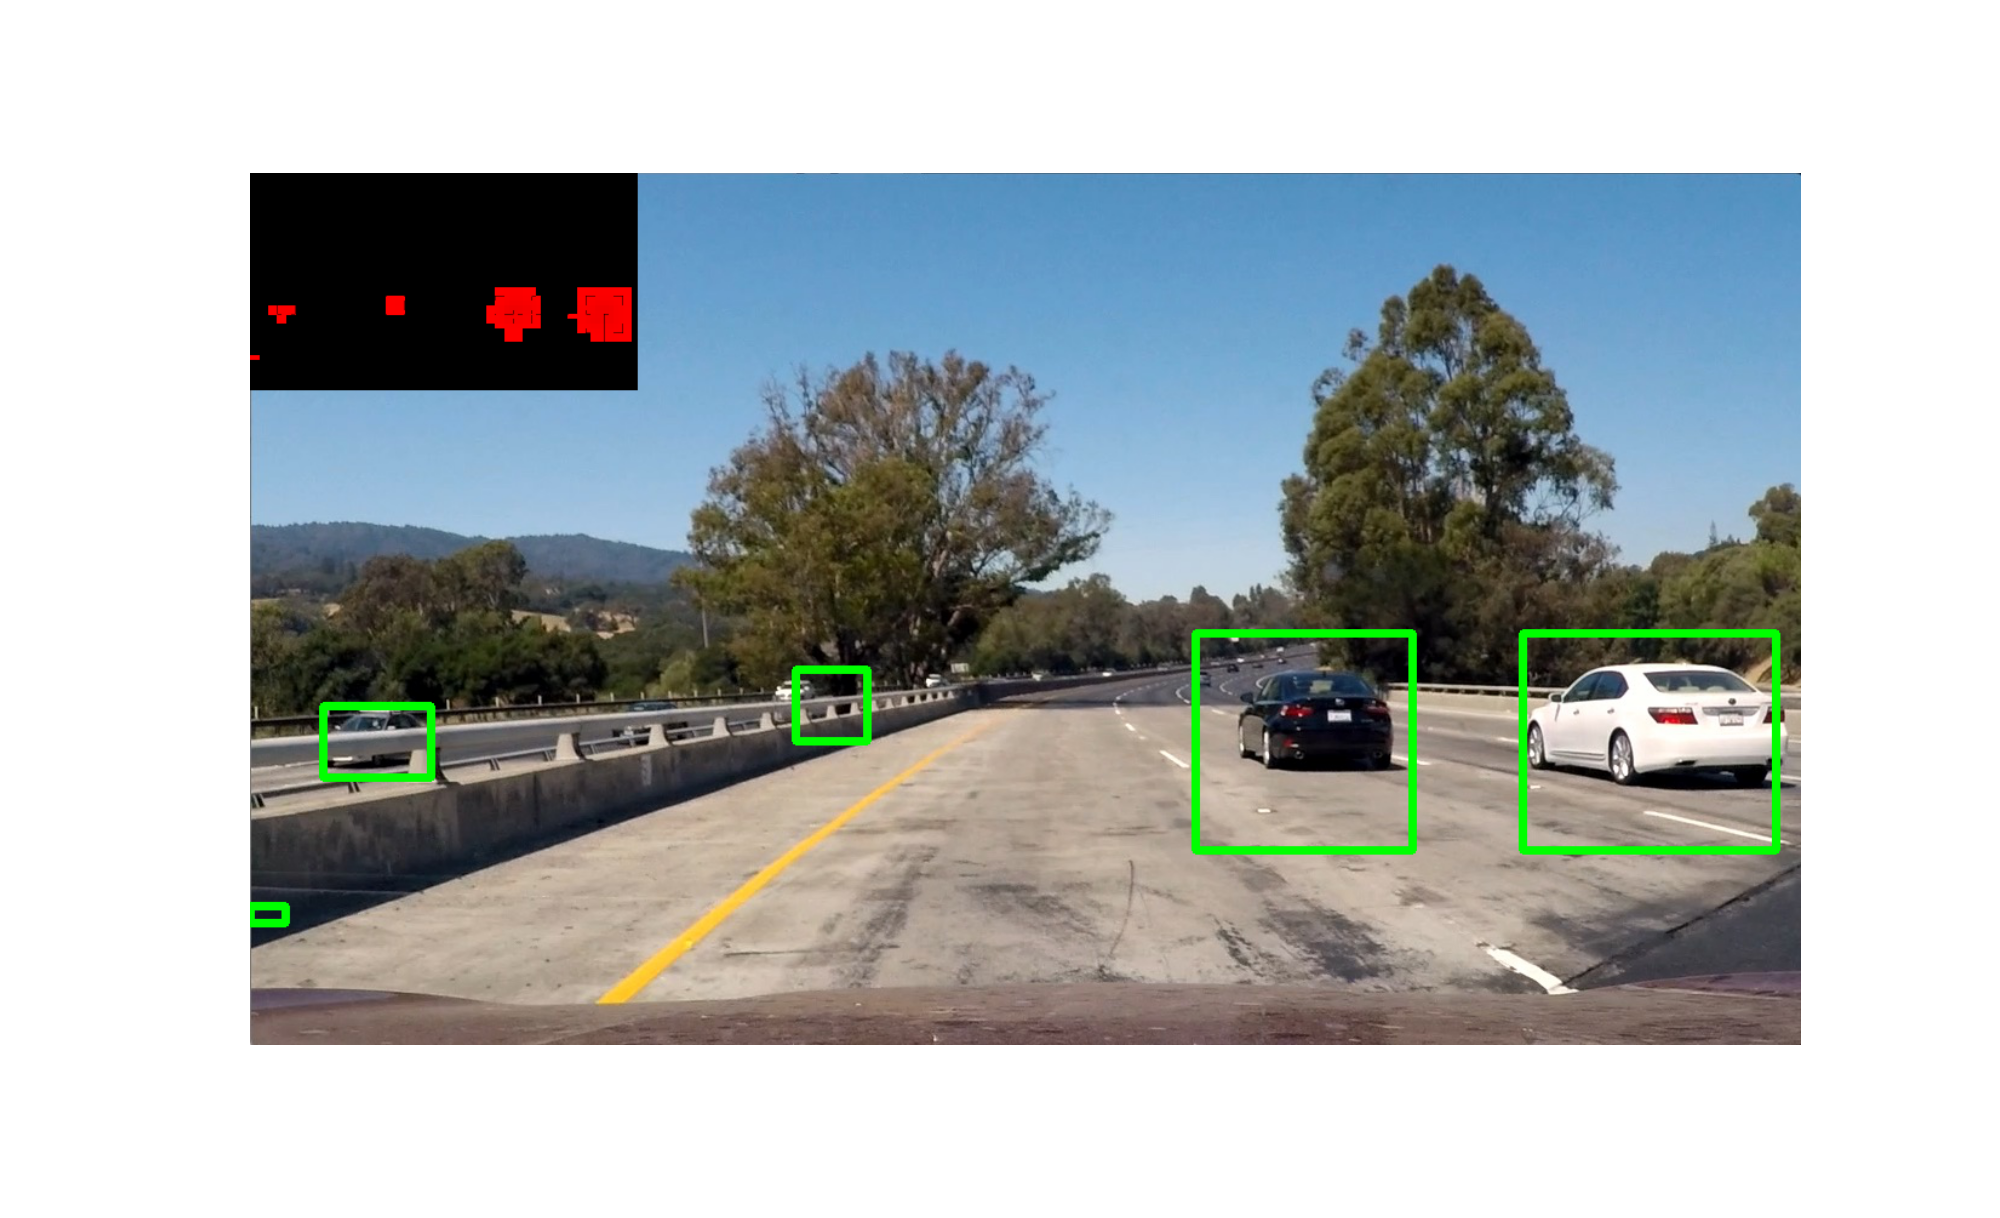
I would have to tune the network more for it to work better with vehicle detection. This network generated more false positives as compared to the custom network.
Prediction
Once the network is saved and the model is saved the prediction pipeline begins. The prediction pipeline has 2 important steps.
- Sliding Windows to identify regions of images
- Heatmap to filter out false positives.
Sliding Windows
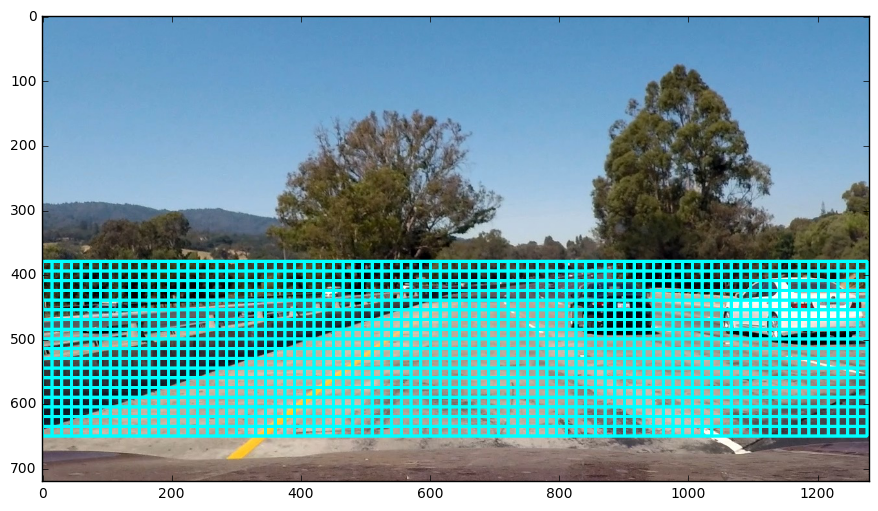
The sliding window approach basically is an algorithm where we decide how to take regions from the image and then check whether they have a vehicle in them or not.
Choosing different Window Sizes
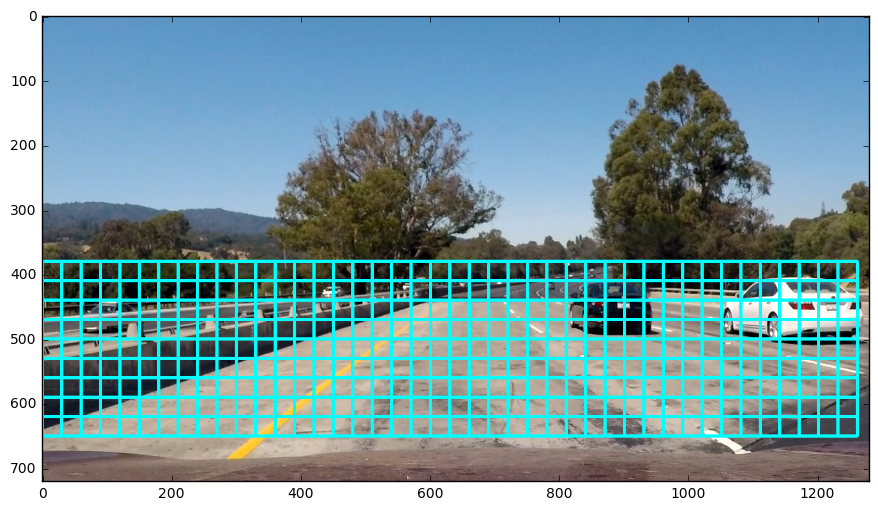
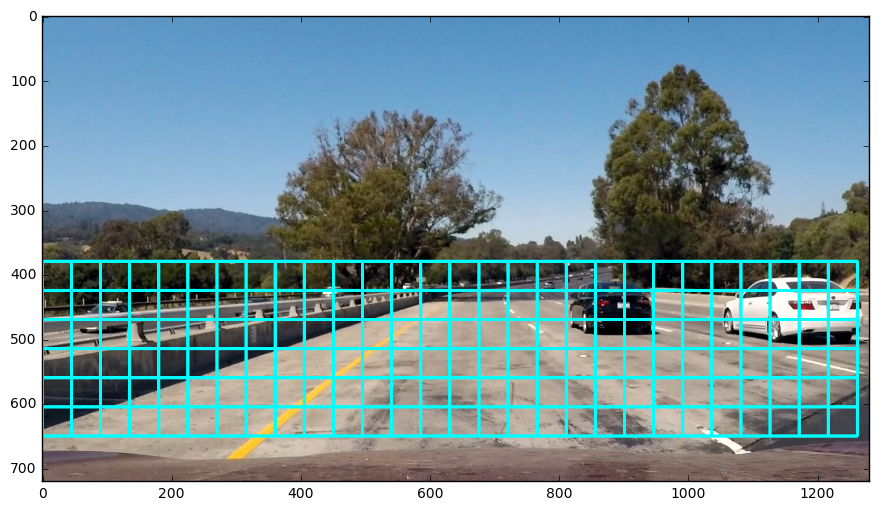
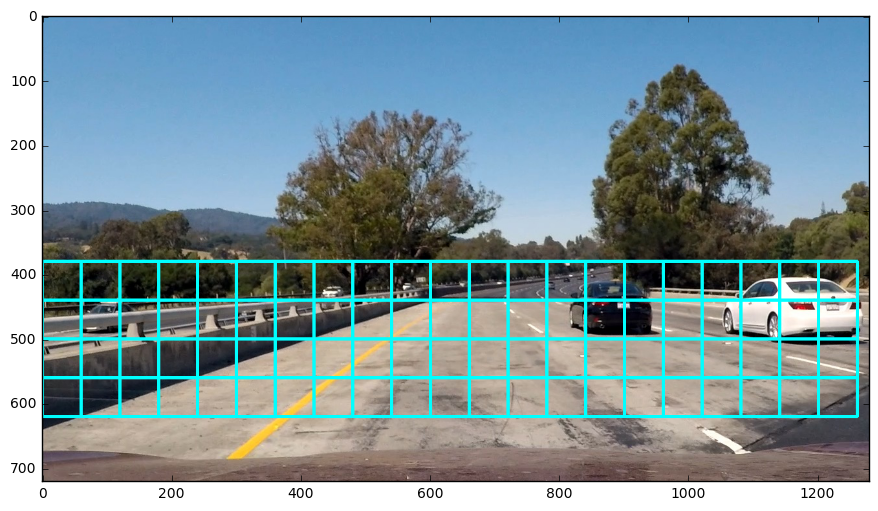
I chose 3 different window sizes to cover the entire region of interest. The region of interest was the area of the image where the cars would appear if it was going on a flat plane. This is an obvious assumption and wouldn’t work in places like San Francisco where hilly roads are present and hence there would be vehicles outside the region of interest.
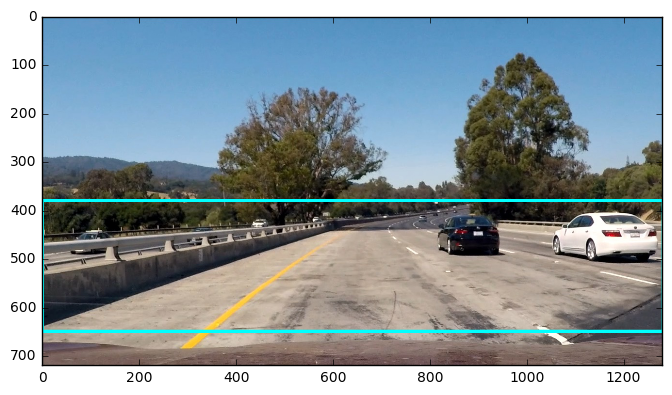
The 3 different window sizes used were
- (30, 30)
- (60, 60)
- (90, 90)
- (120, 120)
These window sizes were chosen based on eyeballing different car sizes across the image.
HeatMap for filtering False positives
A heatmap approach is used to filter out the false positives. The heatmap is a 2D array with a single channel which helps in eliminating false positives from the frame. The technique is rather intuitive. The 2D array is the same size as the image. Once the prediction from the sliding windows is obtained all the windows which are identified as having a vehicle are incremented by 1. The “hot windows” are the ones which contain value greater than a certain threshold. Once the threshold is crossed these areas are reliably marked as being areas with vehicles in them. There is also a frame averaging done to keep the history of a certain number of previous frame’s heatmaps and these are then accumulated with the current heatmap. For this project I average the last 3 frames and use a threshold of 1. The output video images show the heatmap.
Multithreading (didn’t work !!!)
Using multithreading for prediction across windows proved to be tricky. This was because
- Prediction in a thread meant that the GPU had to make a copy of the model everytime which kept on failing.
- Just performing Cropping on the threads while performing the prediction on the main thread proved to be slow since more time was spent on setting up and tearing down threads than the cropping process itself.
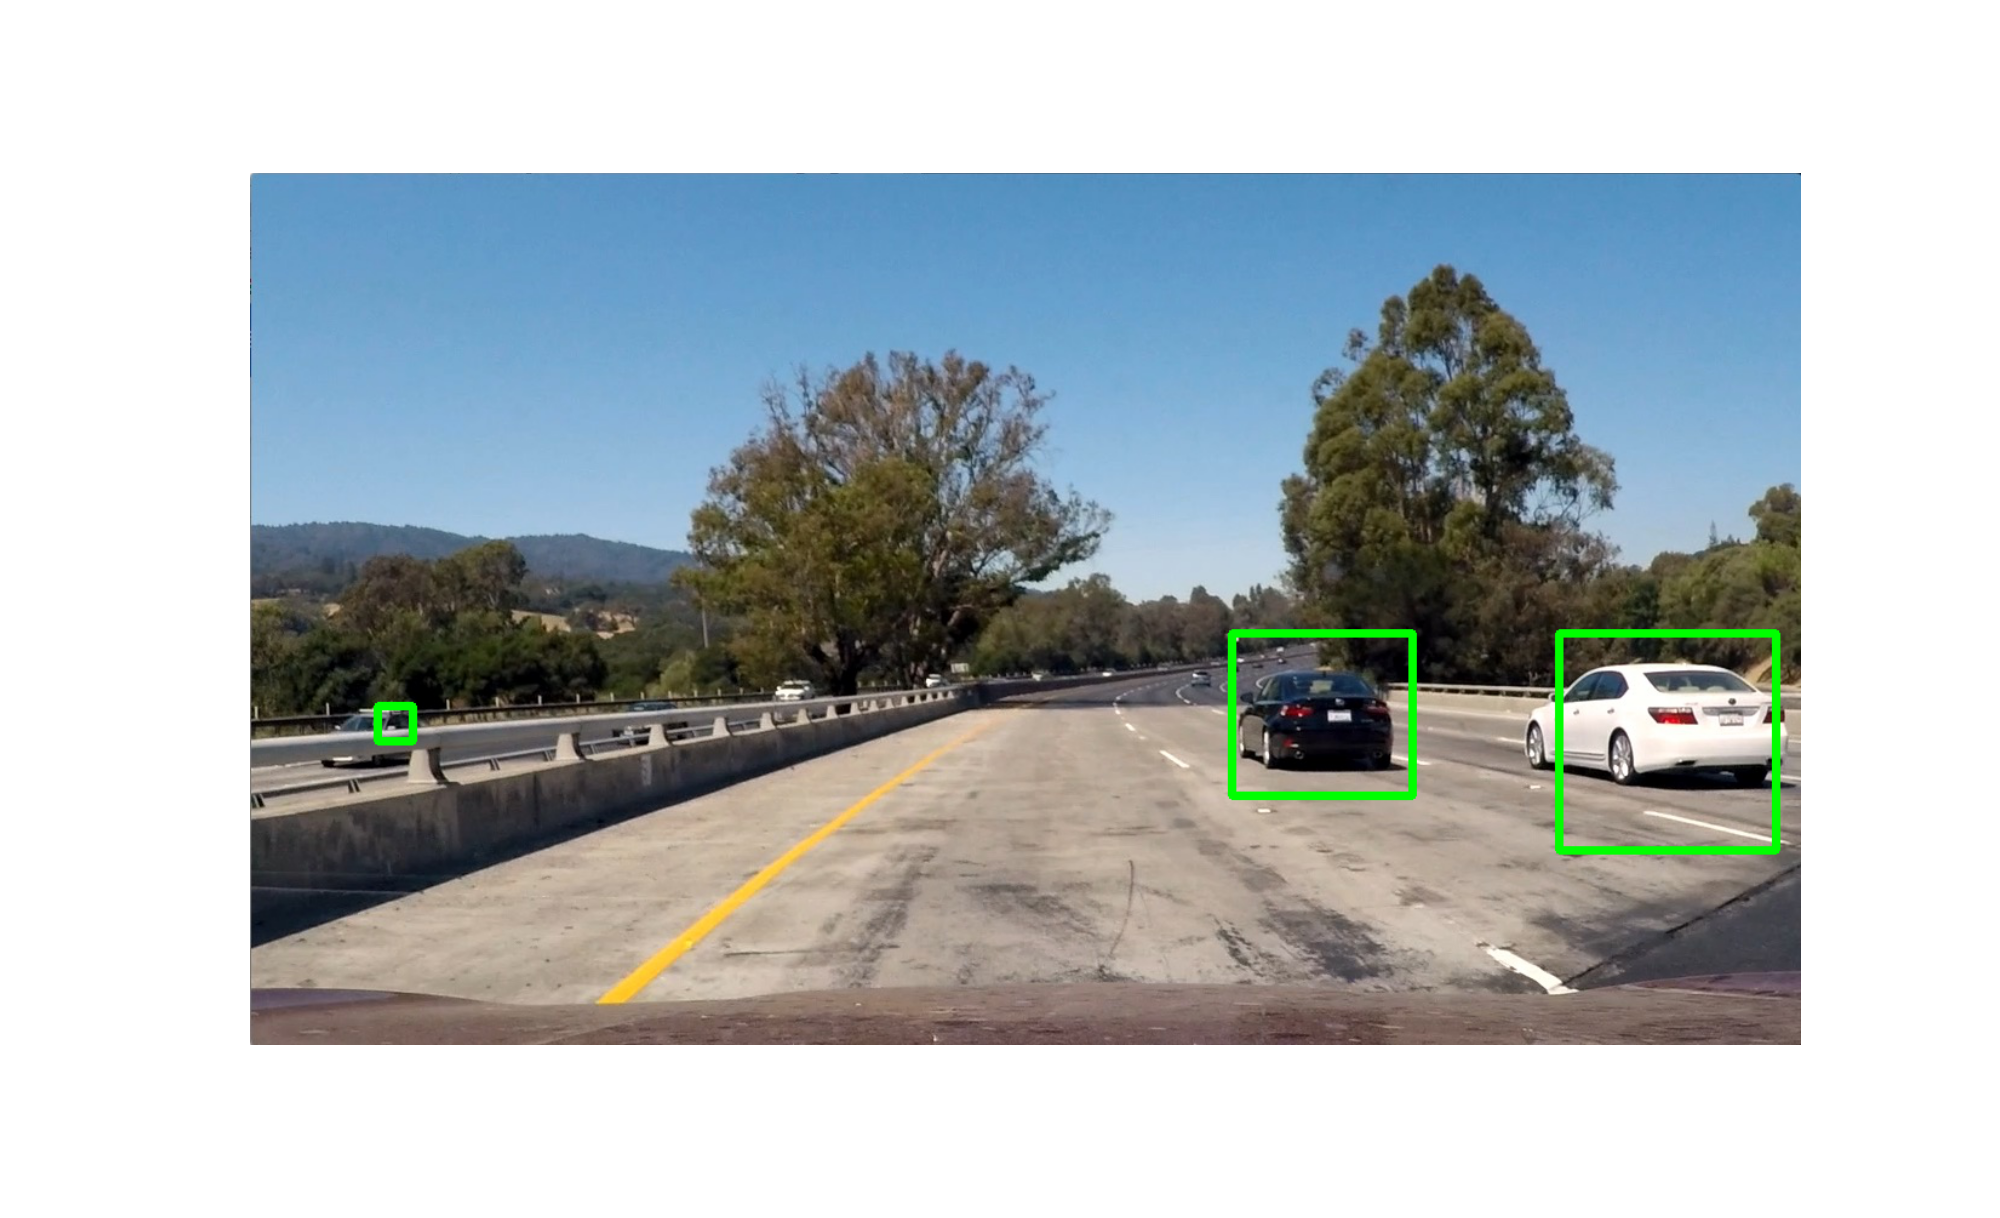
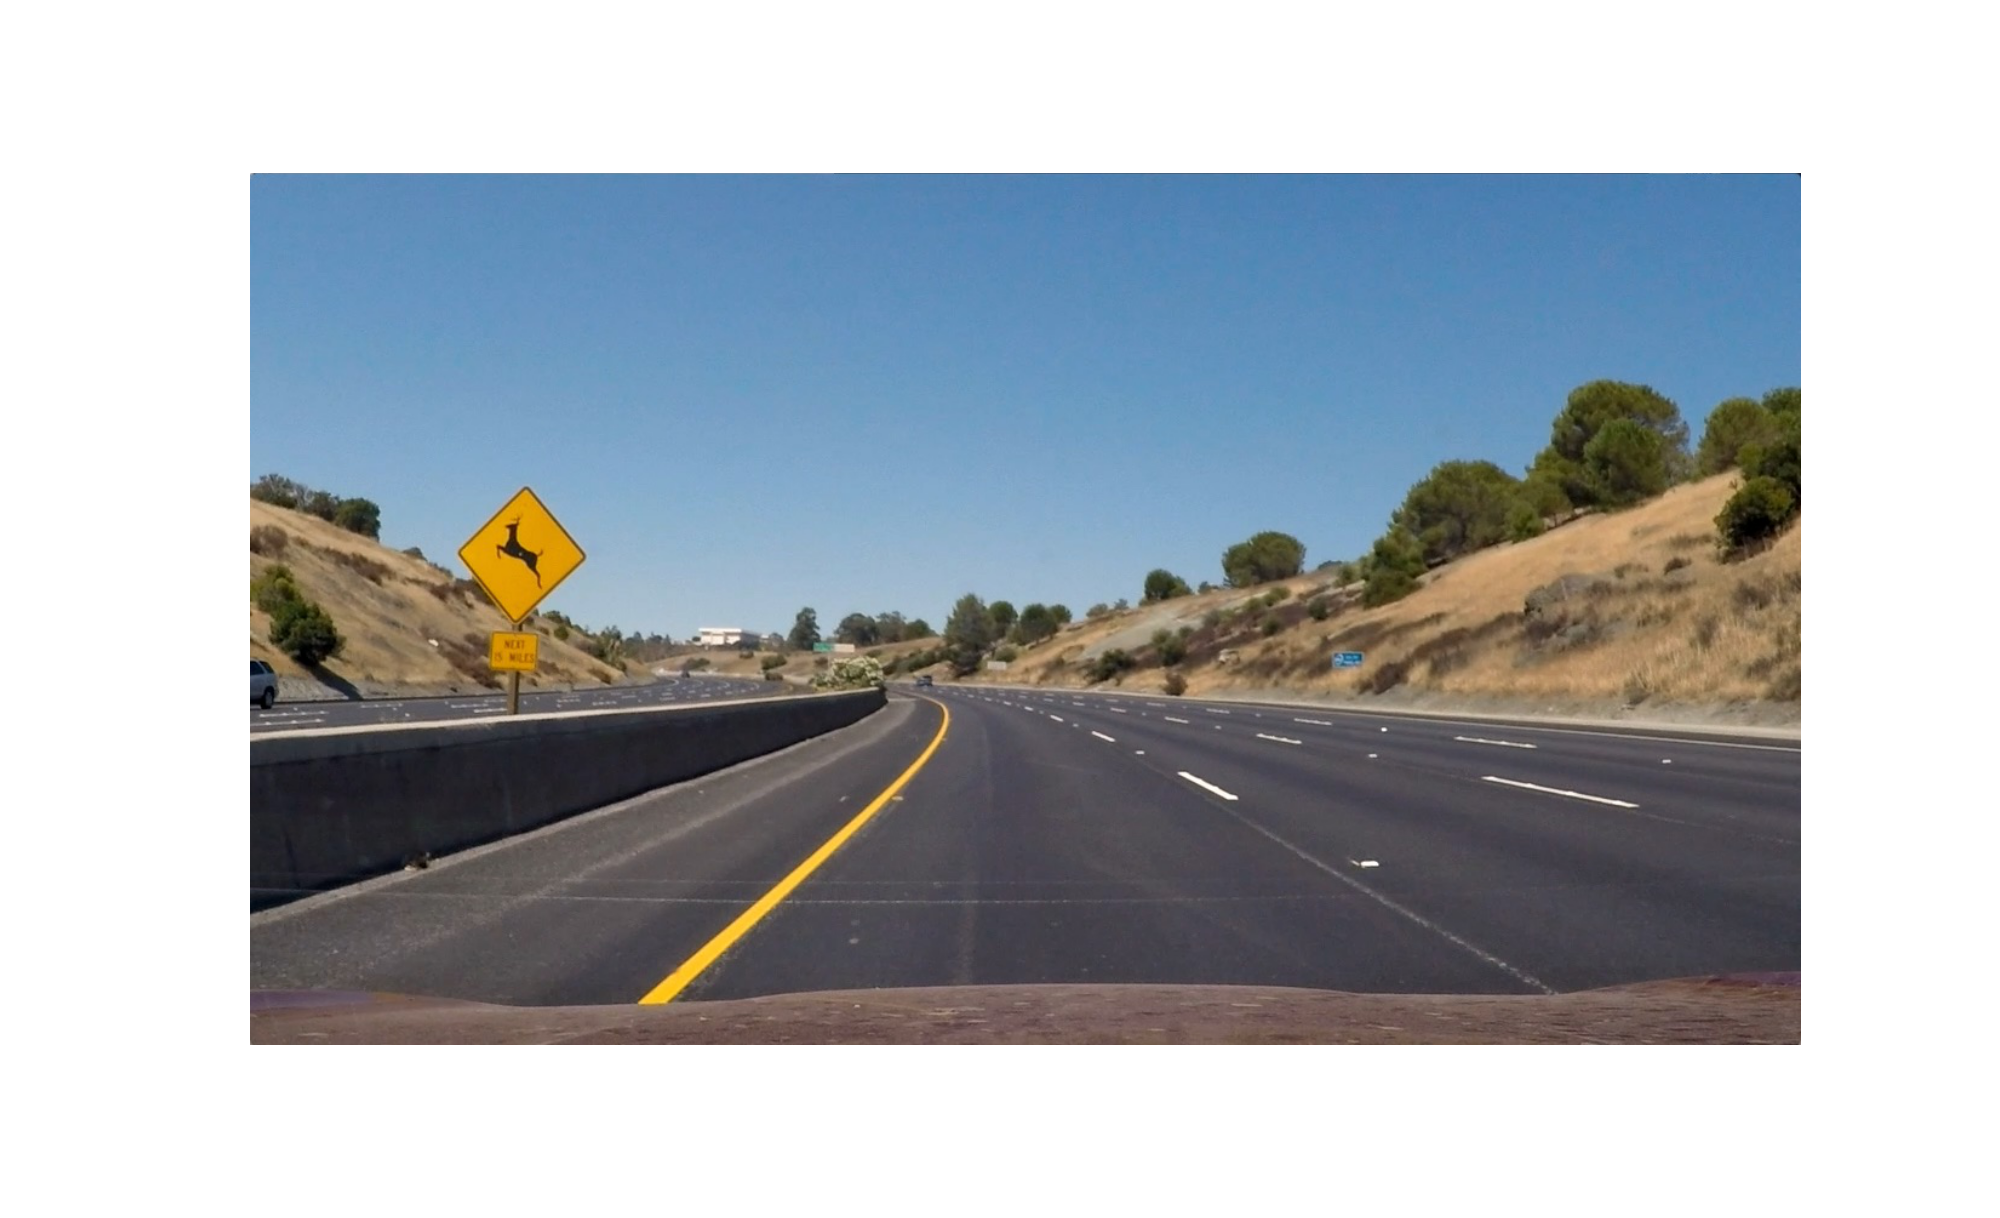
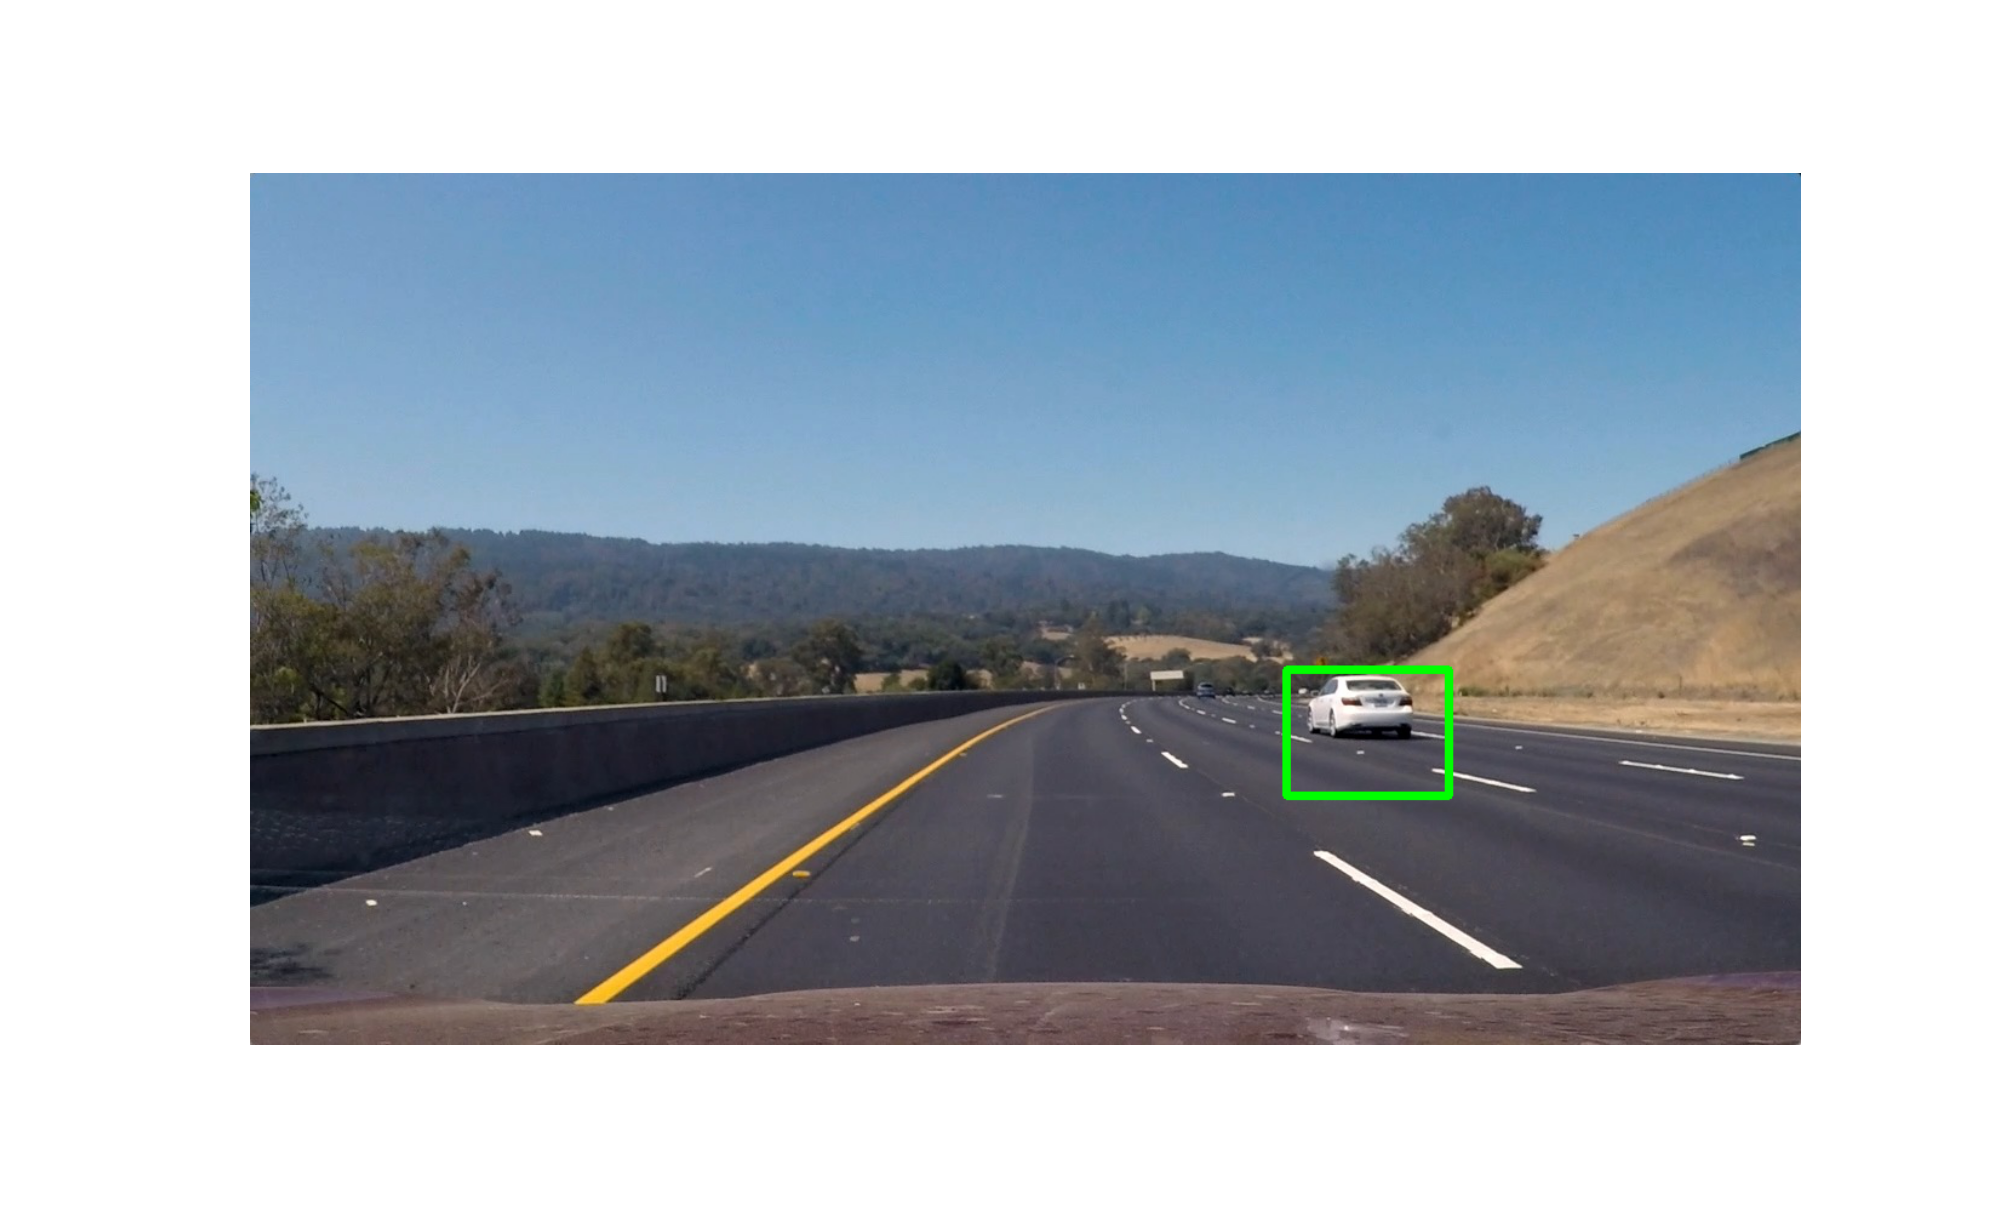
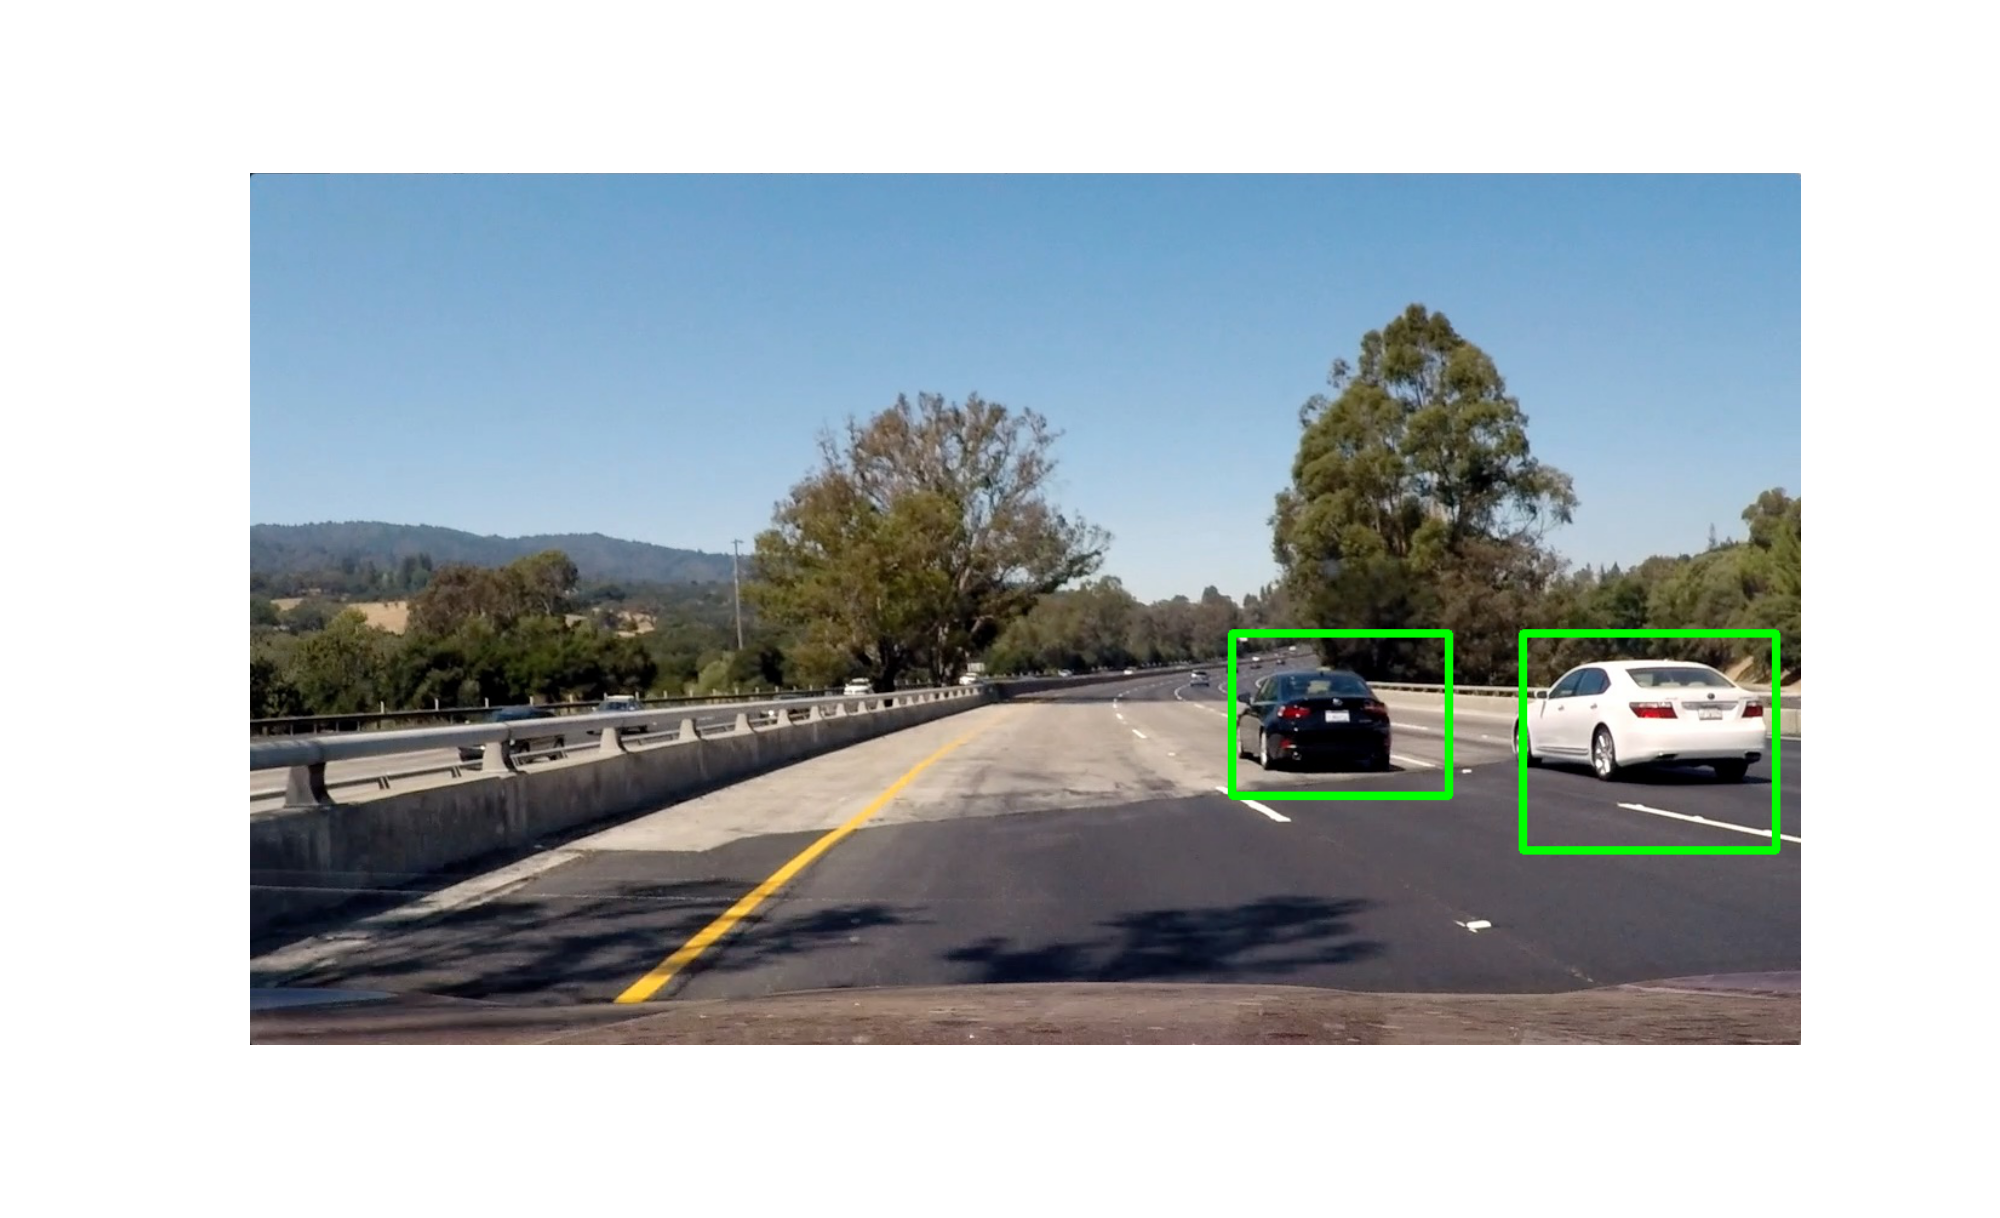
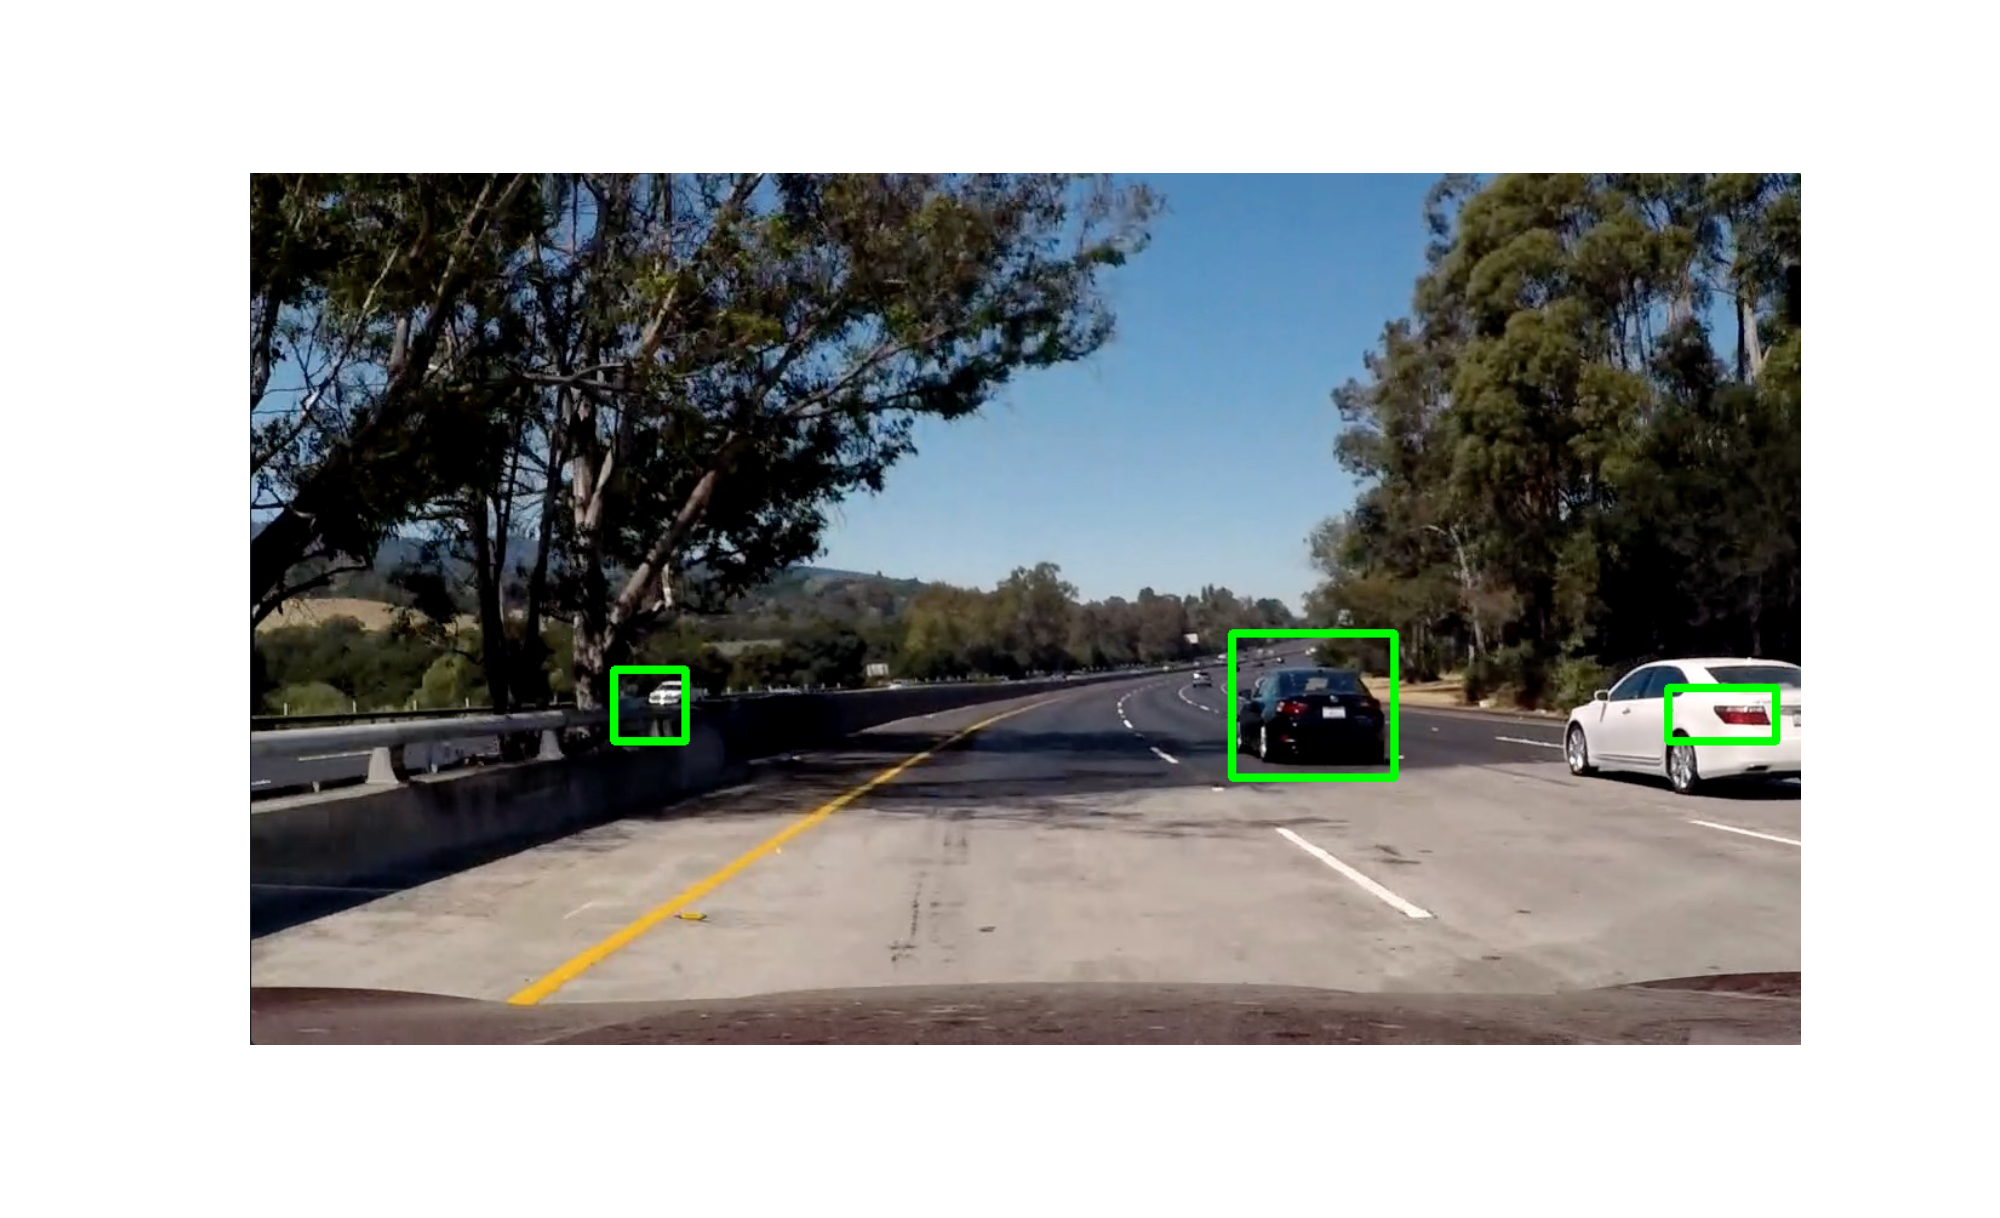
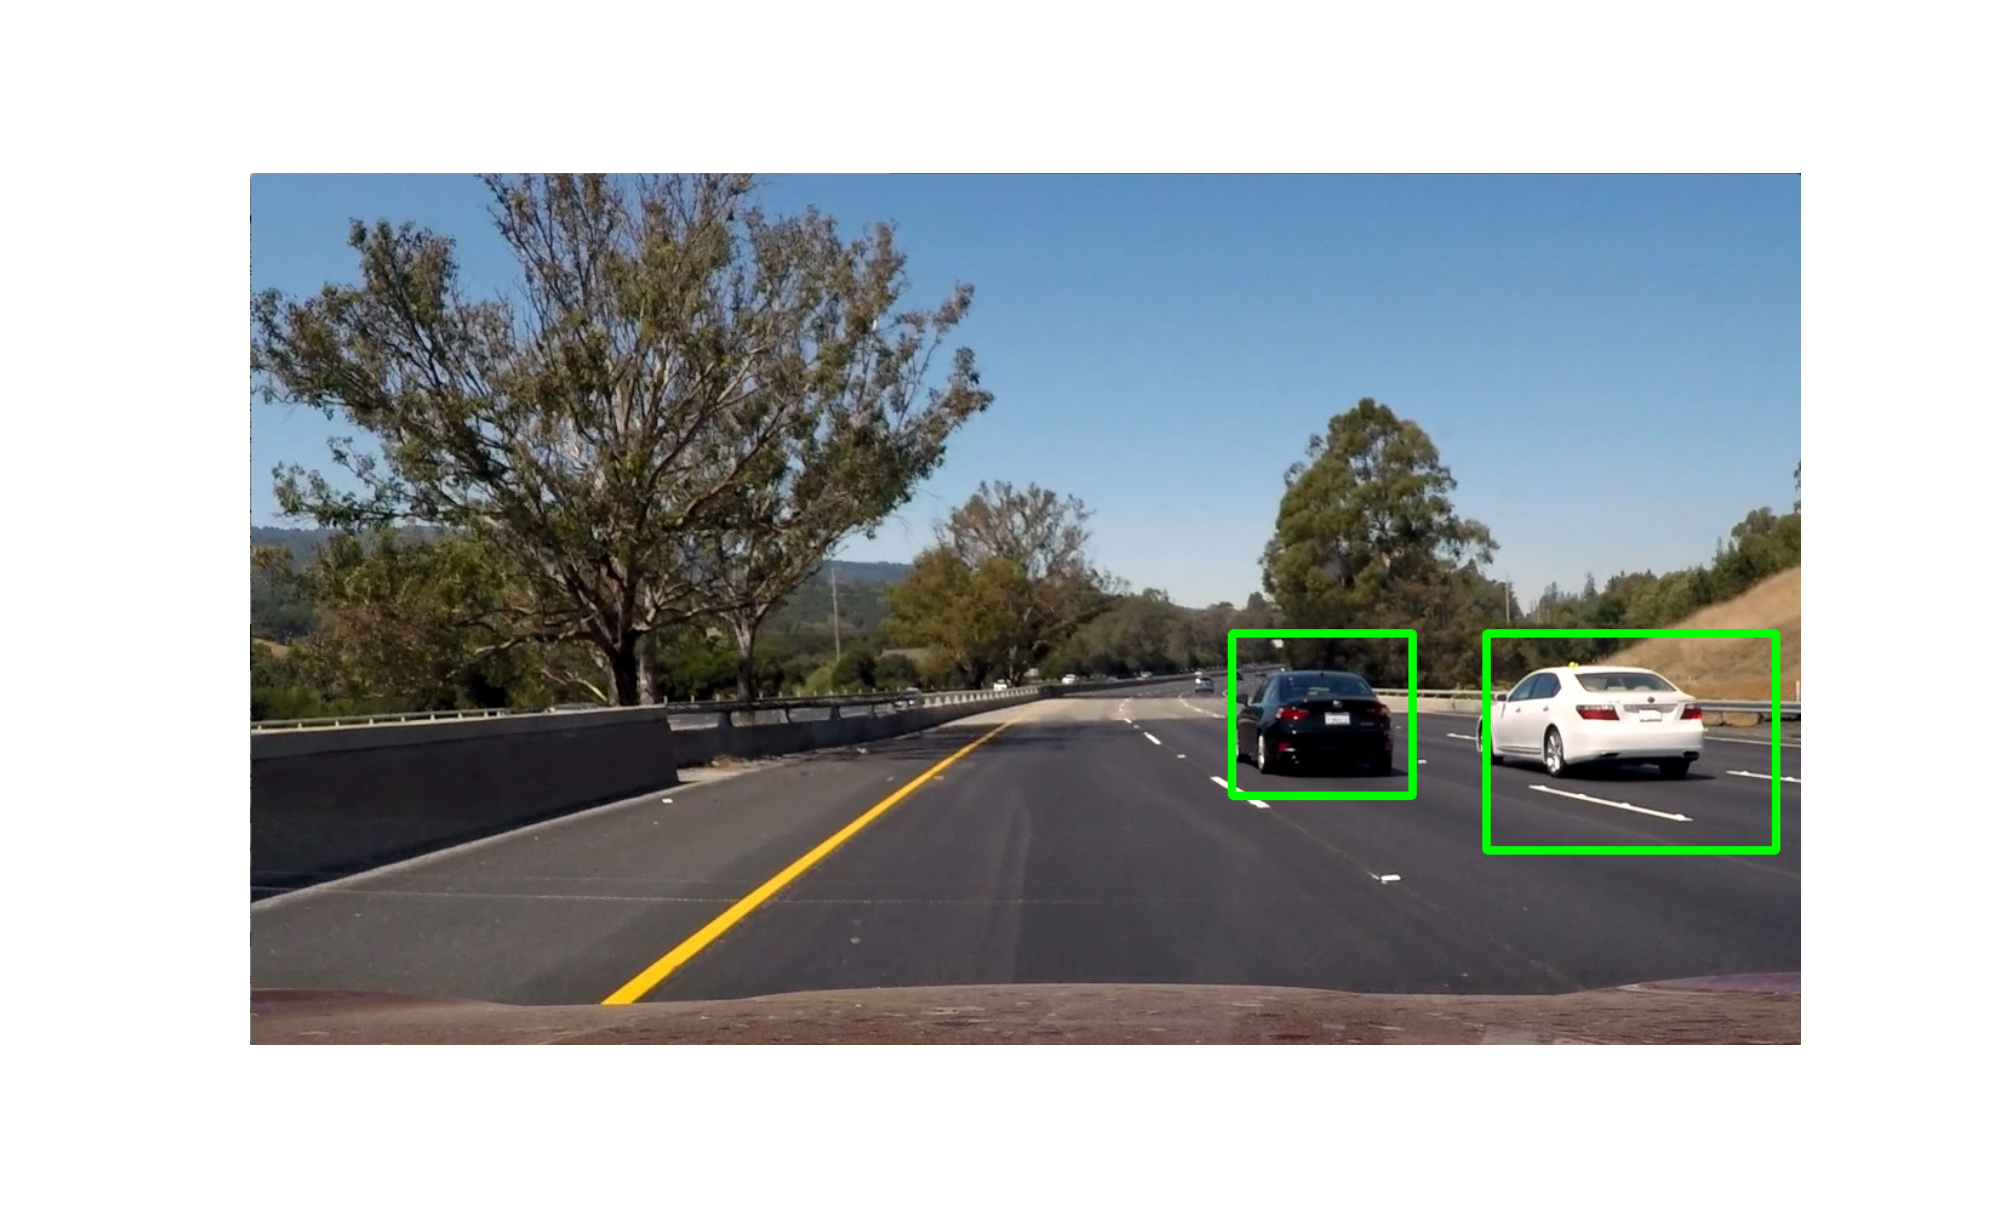
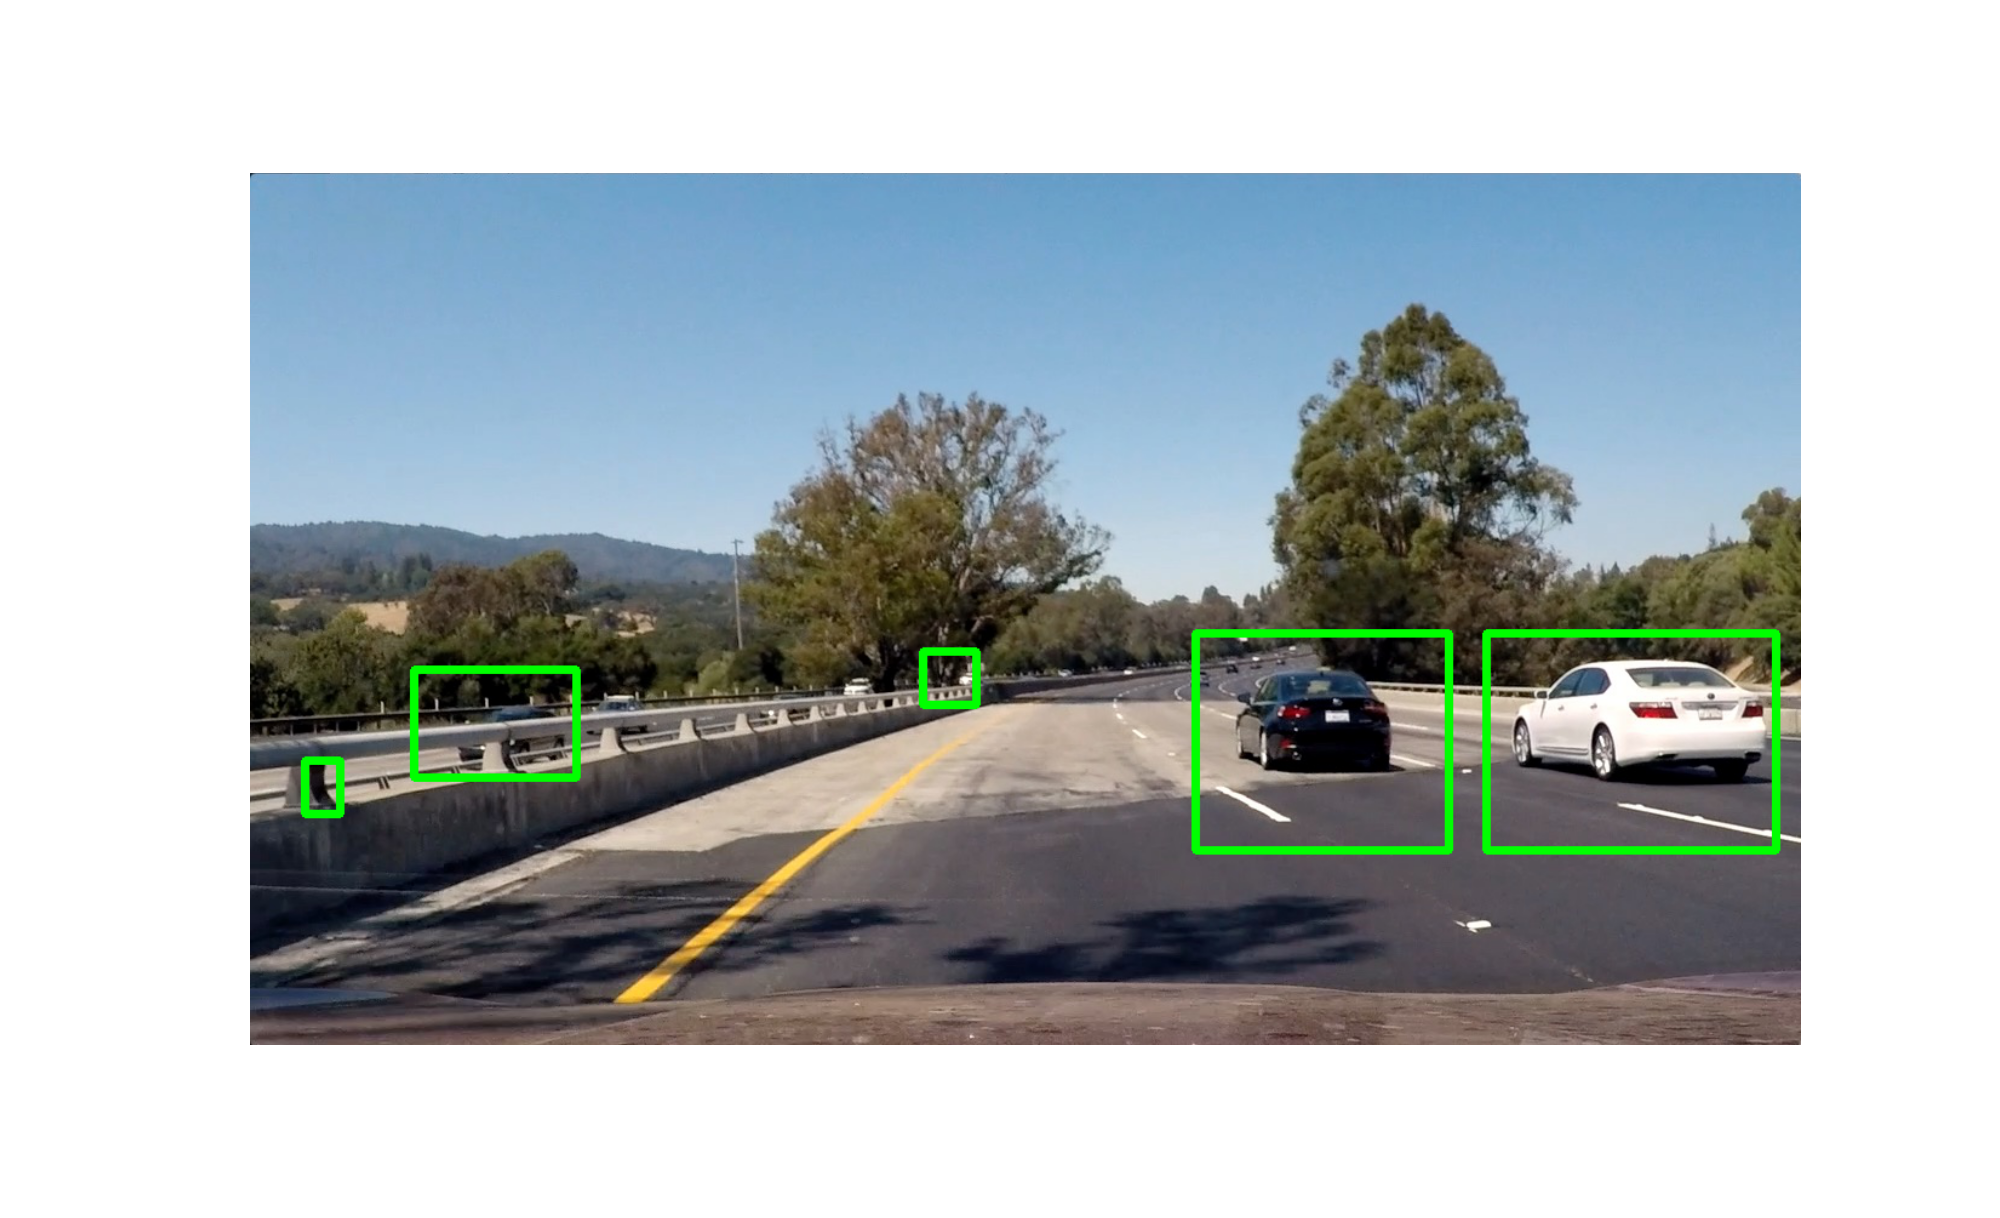
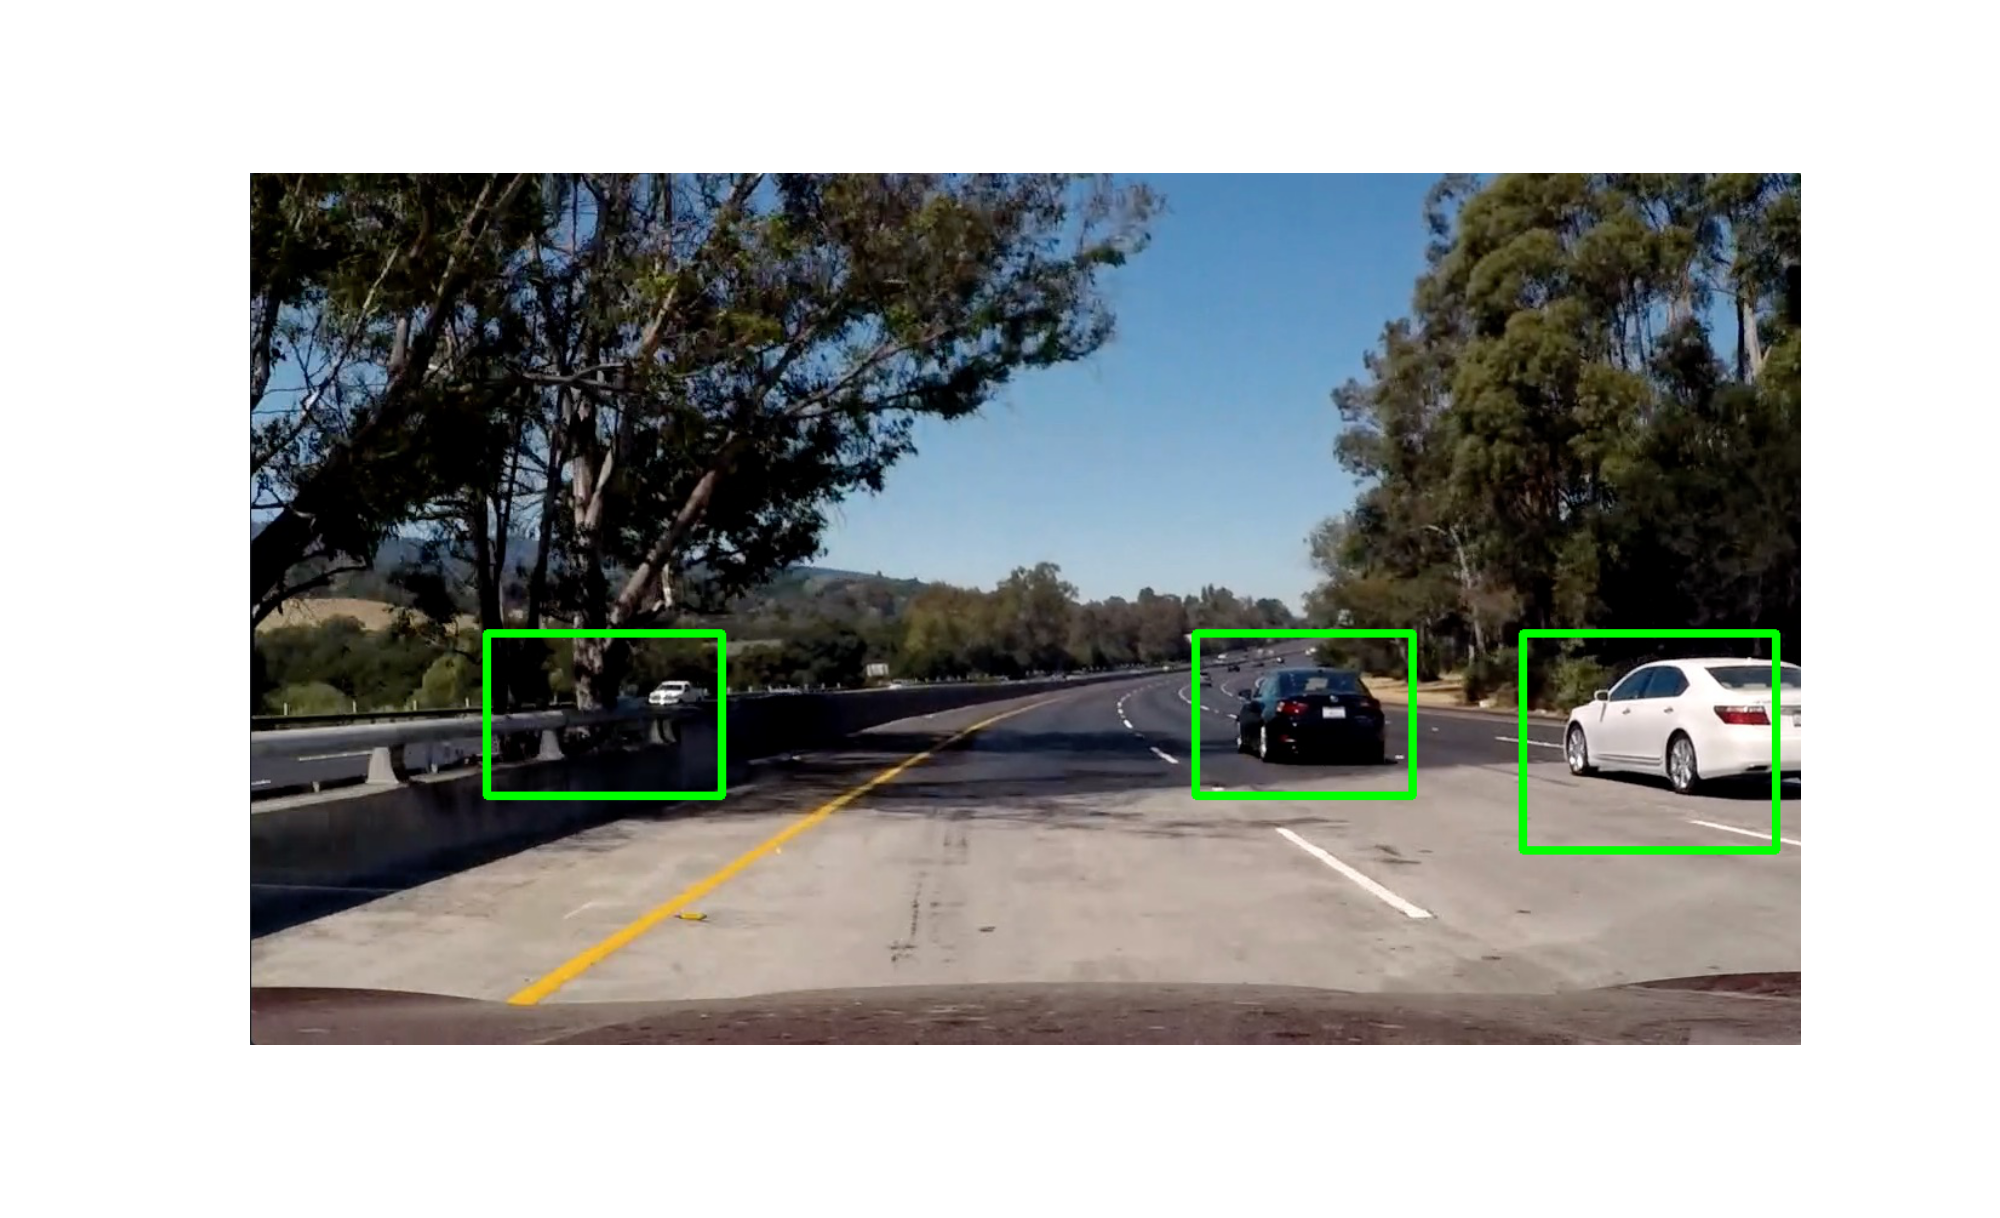
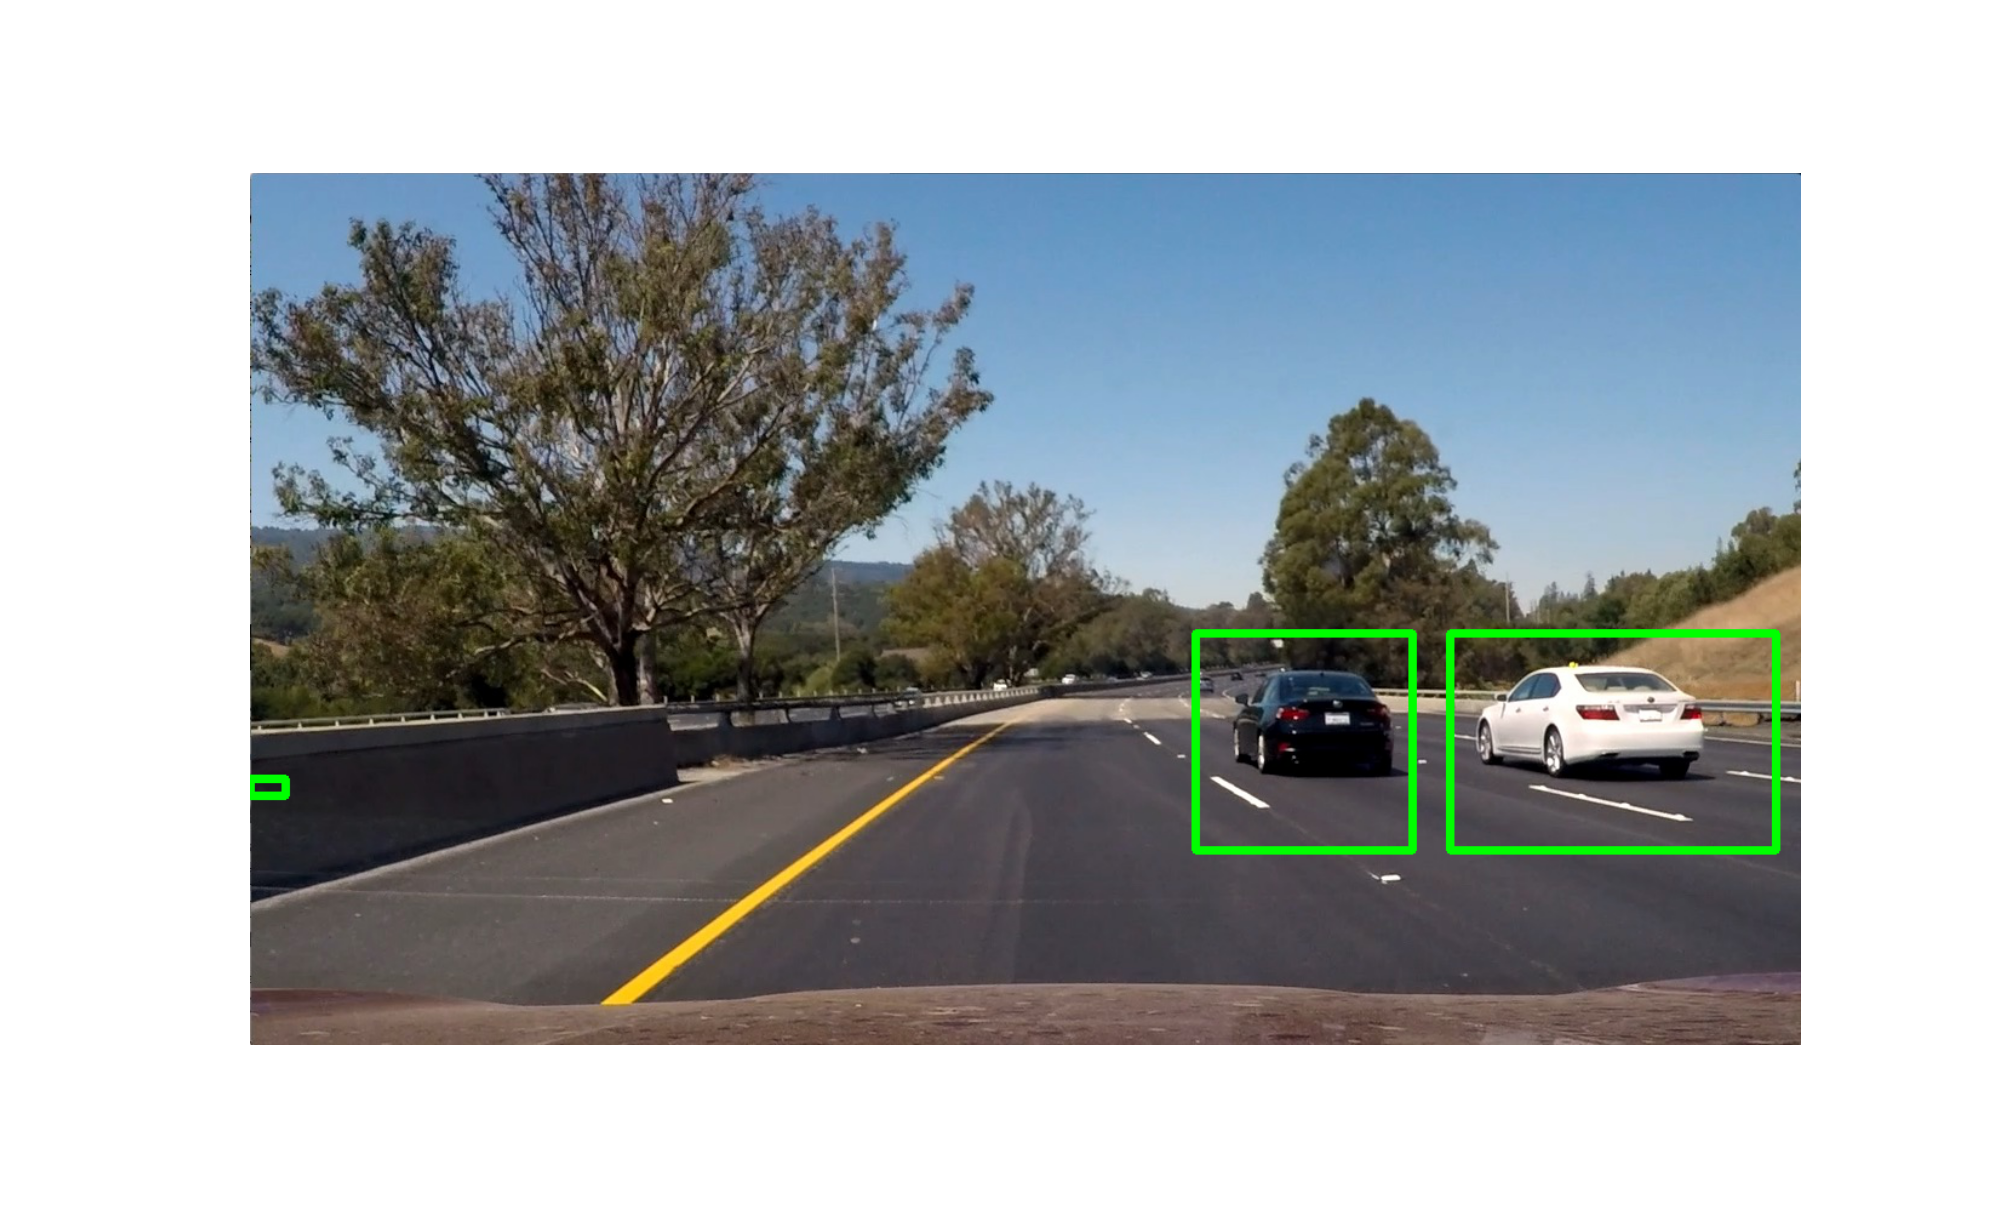
Output Prediction on Test Images (Custom Network)
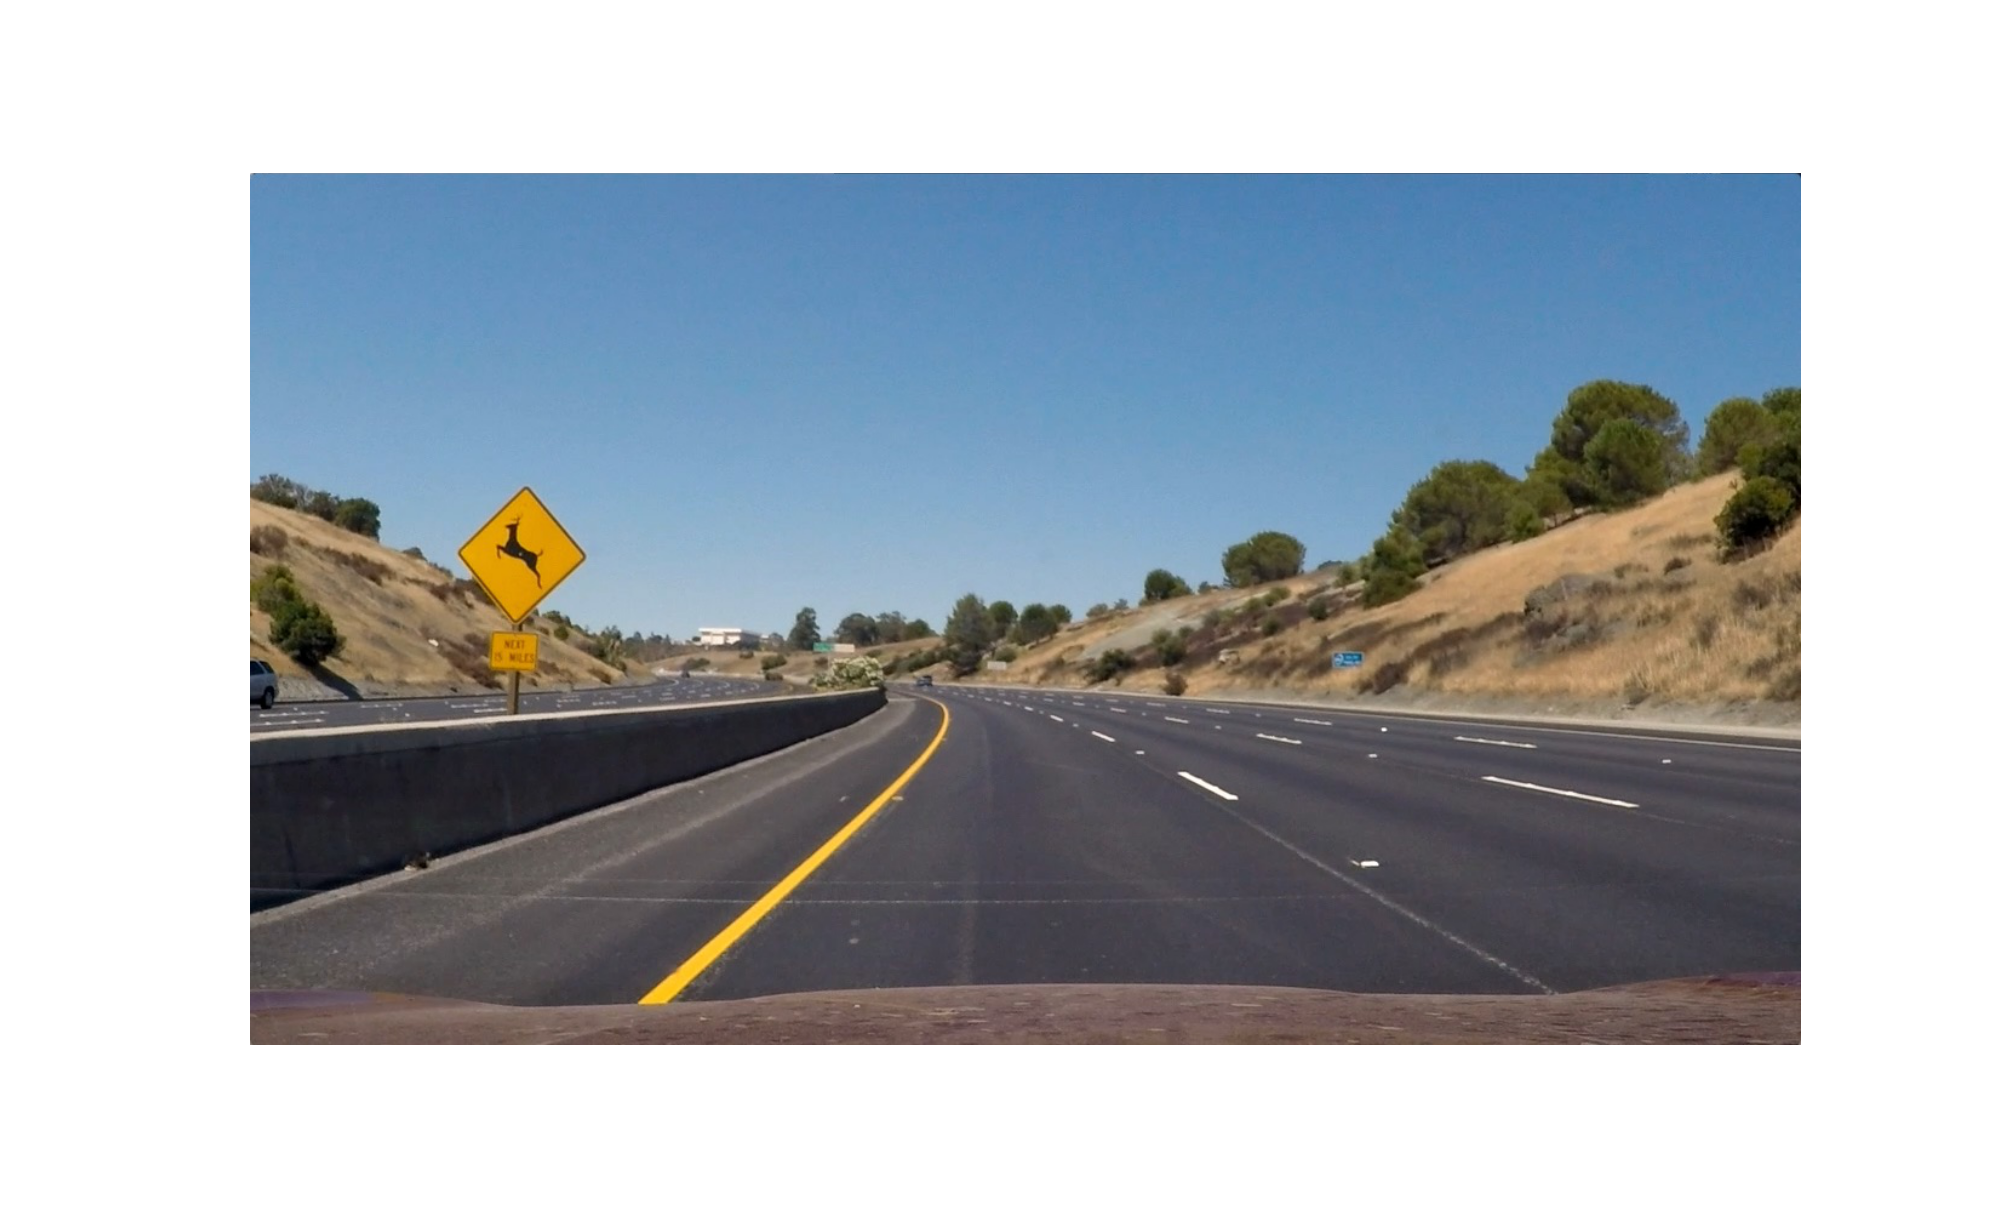
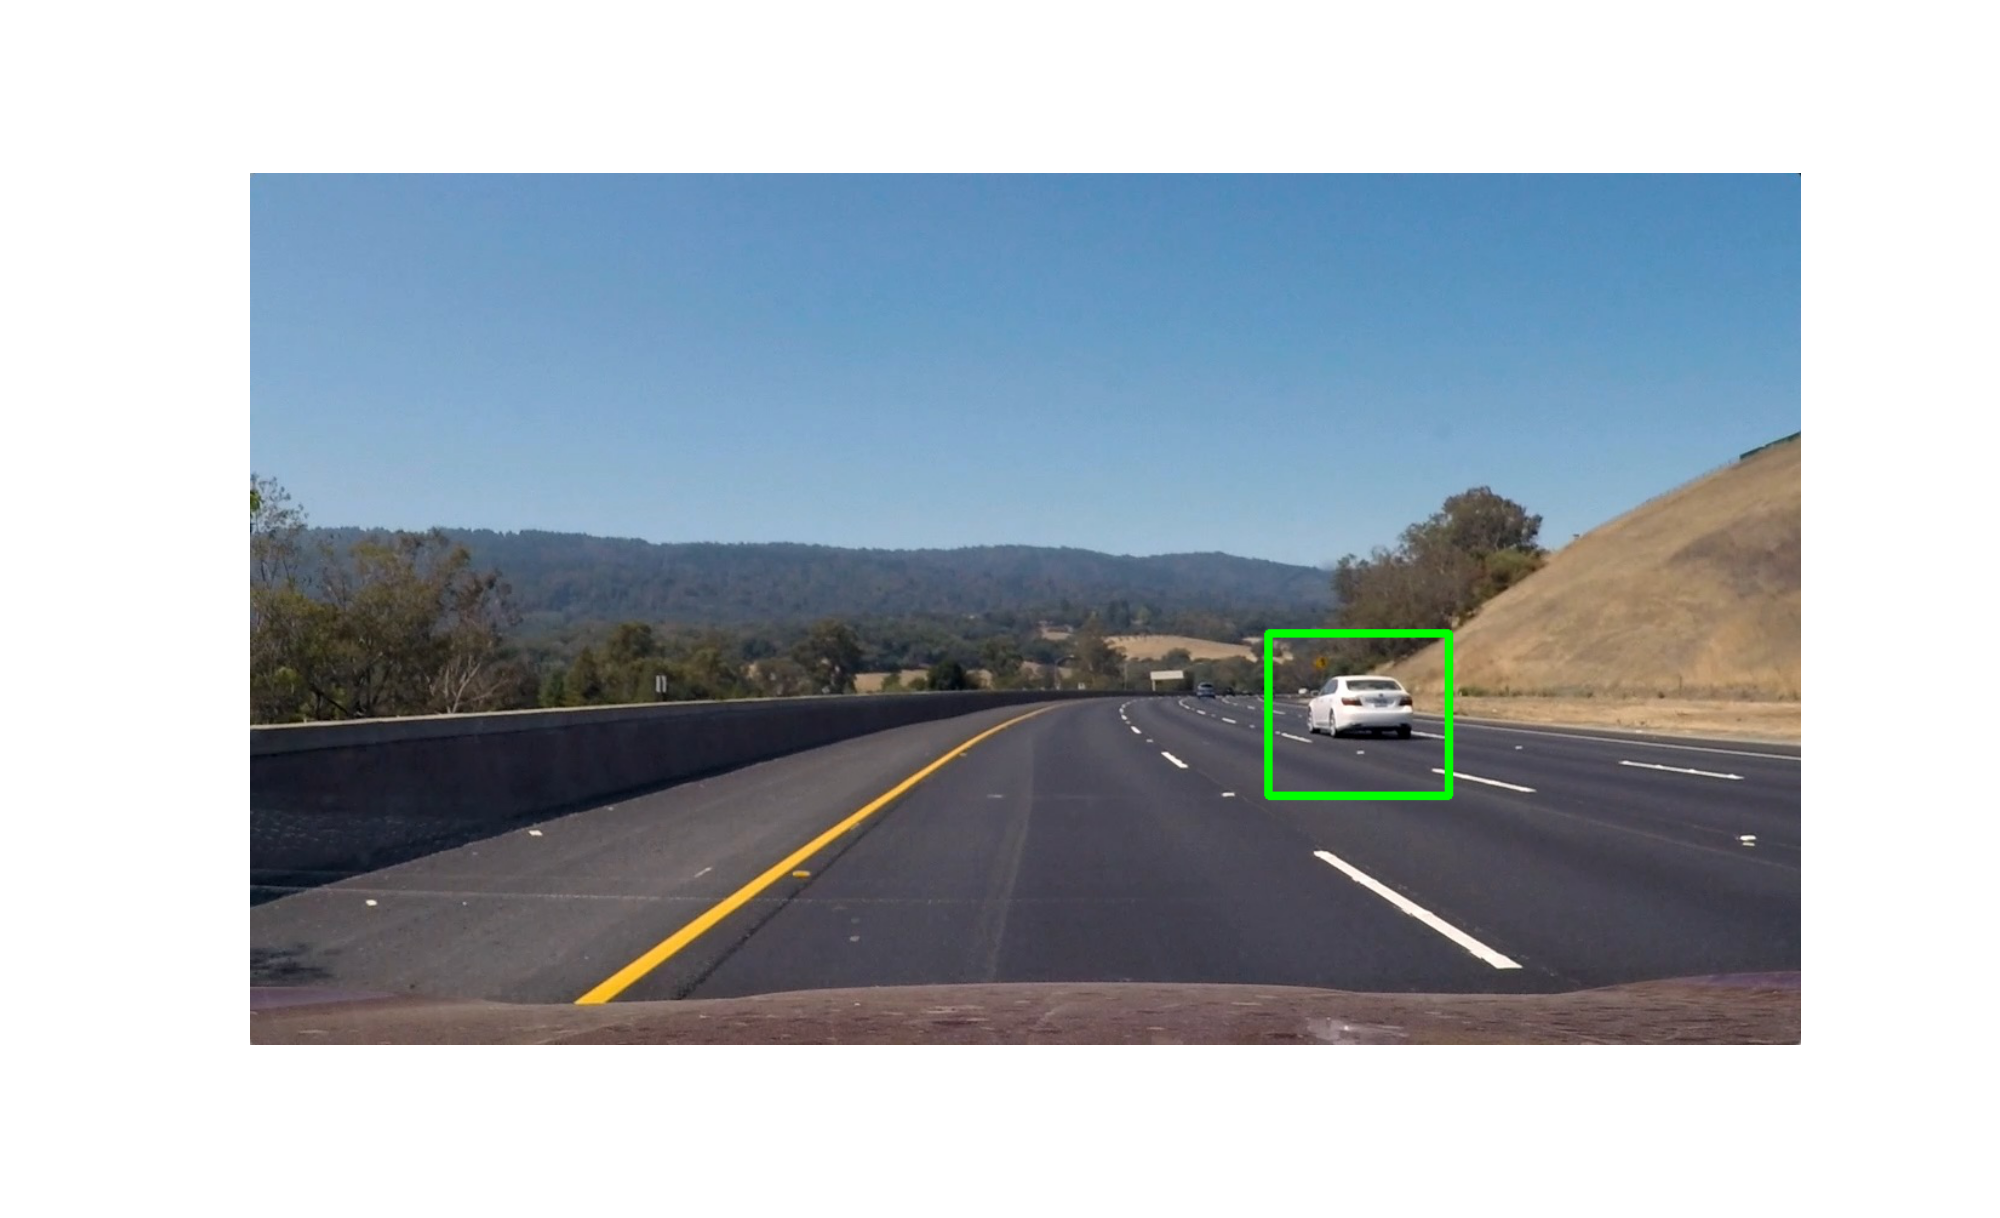
Output Prediction on Test Images (Inception Network)
Project Video (Custom Network)
Project Video (Inception Network)
Future work
- The models need more tuning for getting good accuracy
- The sliding window technique needs to be more finetuned since right now its hardcoded to a few fixed sizes and hence the detection is highly sensitive to these sizes.
- The prediction has to happen in real time and hence needs to be tunes to predict fast.

